 How I Got TV In To Any Room I Want: DVBLink in Action
Two months ago I made the decision to ditch satellite TV in my house and revert to using the standard free terrestrial TV as well as the free satellite TV I could still get via my dish. With the savings made from no longer paying for a monthly subscription I built a new Windows Media Center pc with two satellite TV cards, one of which can accept a terrestrial signal as well. Overall, that project went well and I now have a fully functional set-up that gives me everything I had before, well, everything except the live pay per view football! However, I was constantly having problems with the in-built TV guide being wrong or not showing any details about what TV shows were scheduled. I tried a number of fixes found on websites such as The Green Button, but to no avail. Whilst in my search for a solution I discovered a software product called DVBlink which caused me to open my eyes a bit. Not only can it handle importing guide data from third parties direct in to the Media Center guide, but it could also allow me to stream live TV to other devices around the home via my local LAN. 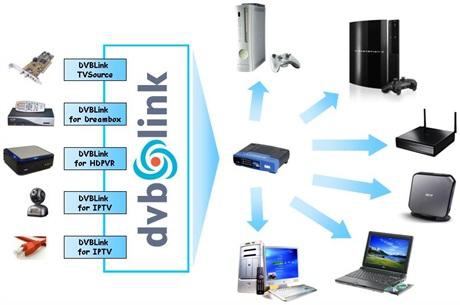 What? No extra TV cable needing to be fed to the bedroom? No extra satellite LNB's? No extra TV cards? It all sounded too good to be true but I did some more reading and finally decided I would give it a try. I thought that the software would be expensive but it's actually very reasonable. There is a special offer on currently to buy the server and network pack together for $50.72, and to make the deal sweeter there is a 20 day trial period so I could try it out and prove it works before paying for it. First of all let's see what the official description of DVBLink is: "DVBLink product seamlessly integrate Satellite, Cable and IPTV sources into MediaCenter, including support for MPEG-2 and MPEG-4 HD video, multichannel audio, EPG information, teletext and subtitles. DVBLink enables all native TV control features of MediaCenter for these sources such as Guide listings, live TV, time-shifting, instant and timer recordings etc. With a unique Guide a la Carte feature user can select source of EPG information for each channel - MediaCenter built-in Guide service, TV provider program listing or from XMLTV files. Combined with DVBLink Server Network Pack, DVBLink products let you enjoy your favorite TV channels throughout your whole house - in Windows MediaCenter, running on network computers, on UPNP enabled clients such as Sony PlayStation3, on nettops and laptops, running Windows 7 and on XBox 360 - and over the Internet using internet browser!." Firstly I worked out what I wanted to achieve, and how I would achieve it. Currently I have my primary Windows 7 Media Center pc in the living room connected to my Windows Home Server via a gigabit switch. The ground floor equipment is connected to the broadband router upstairs using a Netgear HomePlug Adapter Kit. Upstairs in the office I have my main Windows 7 pc, and I also have a Dell M1330 laptop, also running Windows 7, which I use on the road or in the bedroom to watch a DVD or surf the internet. To achieve what I wanted I would have simply have to install the correct software on the correct PC's: Living room Media Center - DVBLink Server, DVBLink TV Source, DVBLink network server Office PC - DVBLink Network Client Laptop - DVBLink Network Client So let's get started with the obvious place, the living room Media Center pc. Installing the Server SoftwareFirst I downloaded the TV Source and Network Pack software from the DVBLogic website. The zip file for the TV Source contains two MSI files that need to be installed and in the correct order, the server sofware, then the TV Source software. 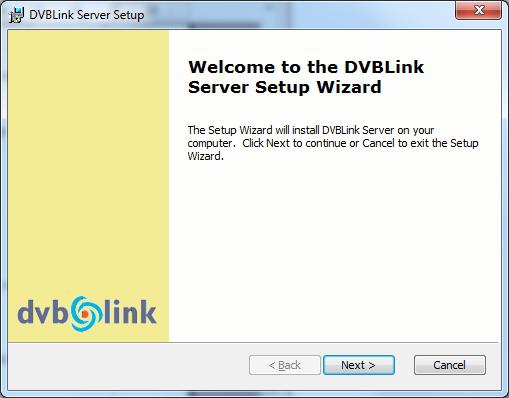
Figure 1: Installing the DVBlink server software on the living room Media Center PC. Installing the server software is a simple case of accepting the licence agreement, choosing where I wanted to install the software, and then letting the installation complete. After the server software had installed it required a reboot of the pc. One reboot later and I then installed the TV Source software. After the install finished it automatically launched the server configuration wizard screen as shown below. 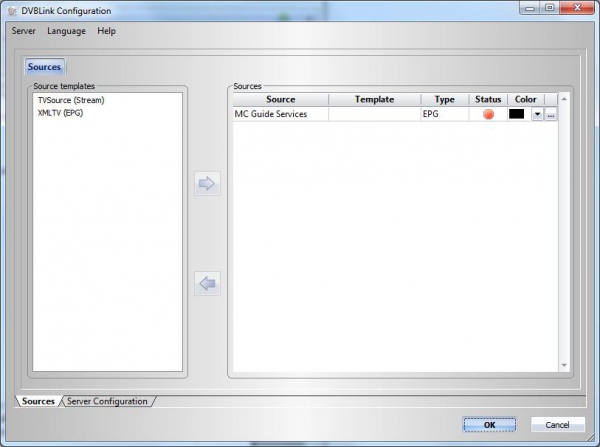
Figure 2: Screenshot of the DVBLink Configuration application that launches after installing the software. At this point I was referring to the documentation which is included with the zip files I downloaded, and is very easy to follow and explained each step as I went along. Firstly I added a new TV source for my first satellite TV card. I selected the TV Source on the left and added it to the right side, giving it the name of DVB-S #1 when prompted.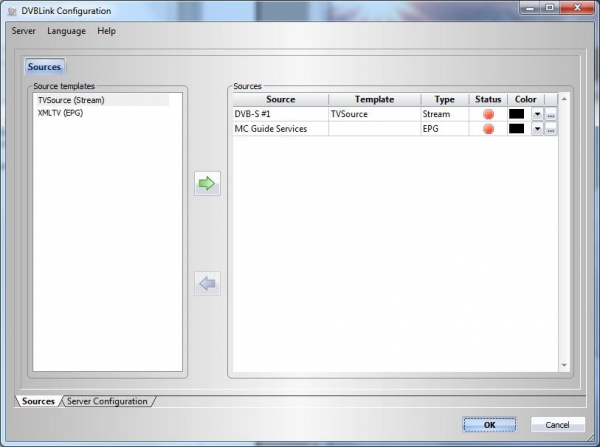 Figure 3: A screenshot of the first TV source that I have created and added to the list. My first TV source is a satellite card (DVB-S2). So I selected the card in the status box which marked the card as Active. 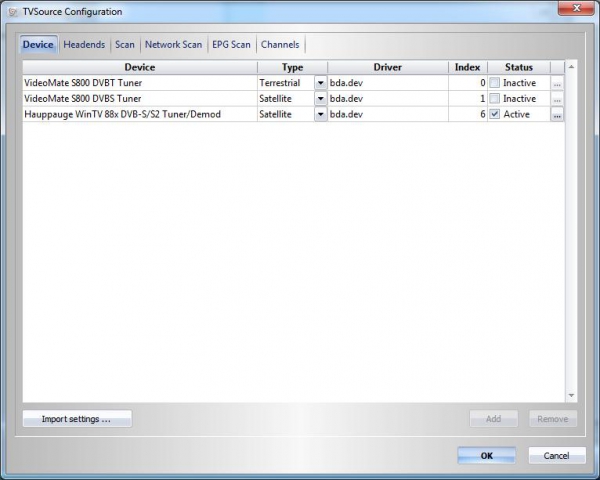
Figure 4: Having created a TV source, I now choose which of my TV cards will be used for that source. Clicking the Headends tab and then clicking Add at the bottom allowed me to add the Satellite settings needed to allow the software to scan for channels in the next step. I chose the satellite which my dish is pointed at from the list in the provider column. Since I am configuring a satellite card, only a list of satellites are provided. If it was a terrestrial card, then only a list of terrestrial providers are listed. 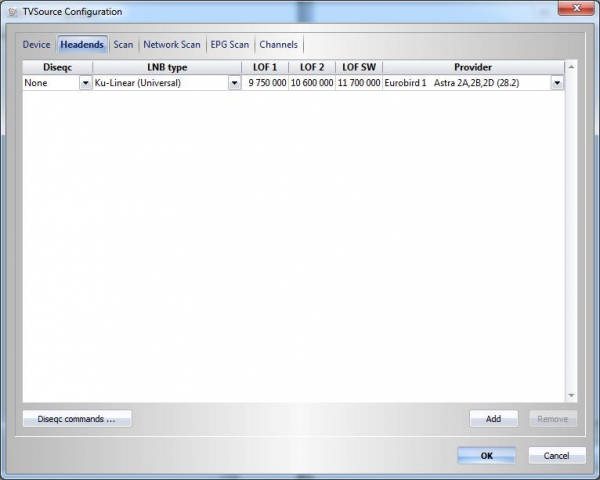
Figure 5: Choosing which satellite my dish is pointed at. Next I clicked on the Scan tab, and then prooceeded to scan for all the channels my TV card can see. This step takes a while, so I grabbed a coffee and put my feet up. 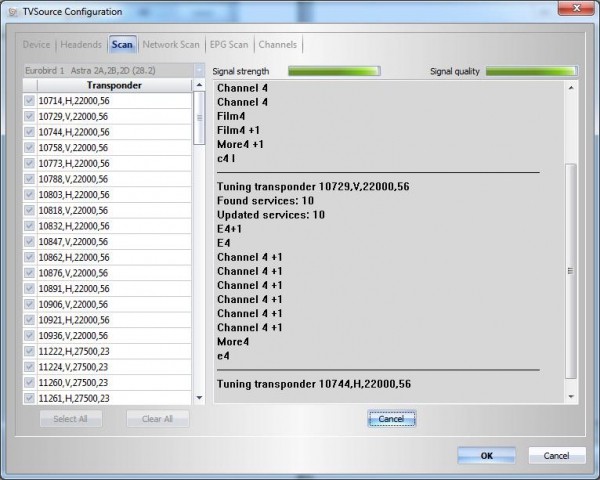 Figure 6: Scanning for TV channels! Once the scan completed I could see a list of all the channels found on the Channels tab. Clicking Ok took me back to the first screen where I could add the remaining two TV cards I have. There is a nice feature here to import the settings from another card if they have the same signal. As my other satellite card does indeed have the same settings as the one I had just installed, I was able to import the settings and not have to repeat all the steps I had just done. That simply left the terrestrial card (DVB-T) to set up and I can tell you now that scanning for satellite channels is a lot faster than scanning for the terrestrial channels was. I should have saved the coffee for that scan!
After adding all three TV cards and configuring them I was now faced with deciding which of the hundreds of channels I actually wanted to appear in my Media Center list. This could be a big job if you are a large family with a lot of different likes and dislikes, but for me as a single guy it was easy. Shopping channels were the first to go, followed by all the encrypted channels seeing as I no longer have a paid service. I actually managed to reduce the list of channels from 1024 to 46 in total! 
Figure 7: Choosing which TV Channels I want to see in Media Center. There were a lot to choose from. In Media Center you have the option to merge your TV cards with the same channels together so you don't end up with three CBS channels or such. This is now configured in DVBLink instead and it is much easier to do so. There is an option to merge all channels with the same name together which the software promptly did. i was then able to drag and drop any that it missed due to the terrestrial and satellite spelling differences. 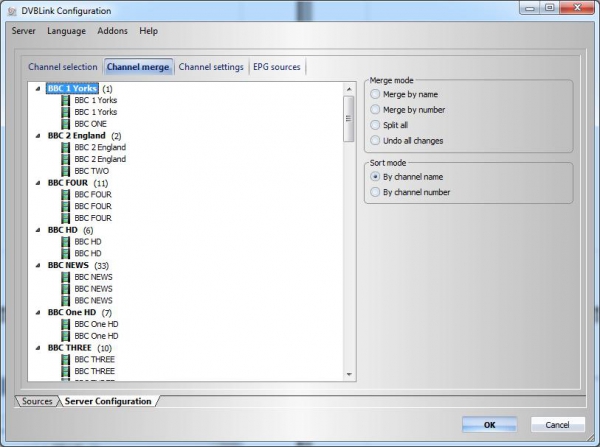
Figure 8: Grouping the TV channels together so they appear as one channel in Media Center. Next up I had the option to configure the channel numbers for each channel. I'm a bit fussy here and I like to have all my channels in a nice order, and all numbered sequentially with no gaps. I know that it might not look quite so orderly to most of you, but it makes sense to me. There is a nice option here to put a pin on any channel you want, which is handy if you have small children and you don't want them having access to certain channels. Perhaps I could put this on and charge guests TV access when they visit and stay in the spare room! 
Figure 9: Organising the channels in to some semblance of order. Honestly, there is some logic here somewhere. The final step of configuring the server is to select where you want to get your EPG data for each channel from. This is the part of the software I was initially interested in as it was this problem that led to me finding it after all. I was glad to see there are a lot of options to choose from and I was able to set up all my channels very quickly with the correct source of EPG data. Clicking OK took me back to the first screen and I exited the Server Configuration application. I was now ready to configure Media Center and see if I could still get a TV signal.
Configuring Windows Media CenterAt this point all I have succeeded in doing is configuring the DVBLink TV Server software to be aware of my TV cards and the signals they receive. So how do we integrate this in to Media Center? The answer is: the same way I would normally. Installing DVBLink also installed four new virtual TV Capture cards as well as four new virtual TV Tuner Cards in to Windows Device Manager. 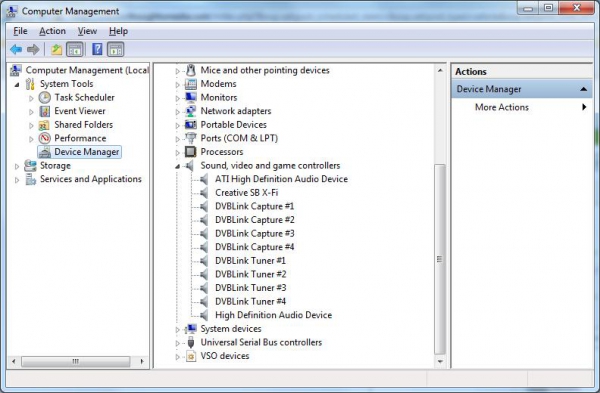
Figure 10: Screenshot of the virtual TV tuners and capture cards in Windows device manager on the living room PC. The capture cards are used to take the signals from your physical TV cards where the server outputs them to the tuner cards. This means when you scan for TV cards in the Media Center settings it will find for Satellite tuner cards. 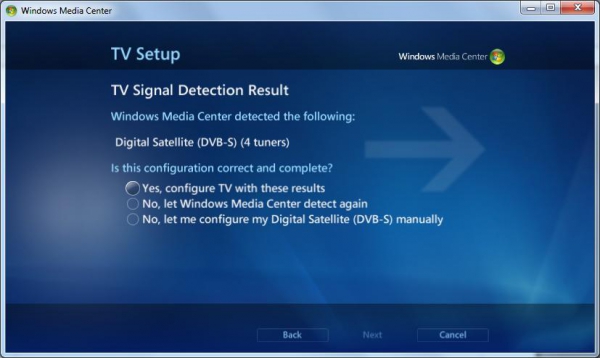
Figure 11: A shot of the TV setup wizard in Media Center finding the four virtual tuners. Once the TV setup wizard was complete I clicked the TV Guide in Media Center to check if all the TV program details were there. 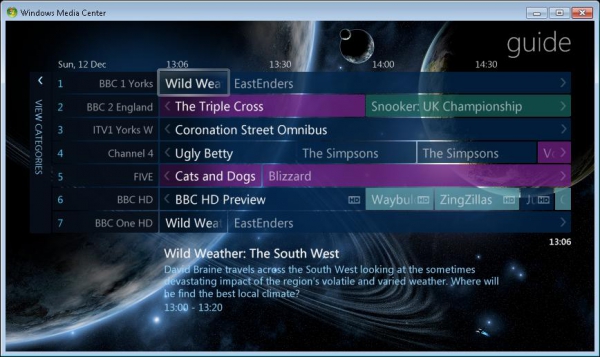
Figure 12: A shot of the TV guide with all the TV show data present and correct. Perfection! No missing data at all. Previously about 25% of all the channels simply displayed 'No Data Available' and now each channel is correctly shown. Time to test that the actual TV channel displays. 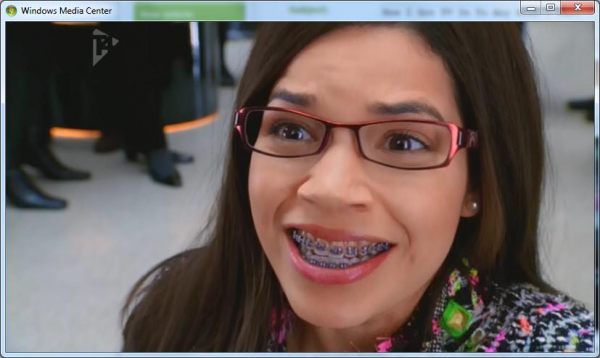 Figure 13: A shot of a live TV show proving the virtual tuners are functioning correctly. No problems here. All the TV channels I set up work correctly and the picture looks perfect. Now the primary Media Center is configured, it's time to move on to the other Media Center PC's in the house.
Streaming TV to other Media Center PC'sThis part is incredibly simple. I downloaded the Network Server pack and ran the server setup on the living room Media Center pc. This installs a plugin in to the TV Server software that I installed at the start, which is a nice feature as everything is found in one program and there is no need for multiple pieces of software to achieve what I want. Once installed I simply had to configure some simple settings for remotely accessing the TV service from a web browser. At this stage I simply added a user name and password and left everything else as per the default settings. 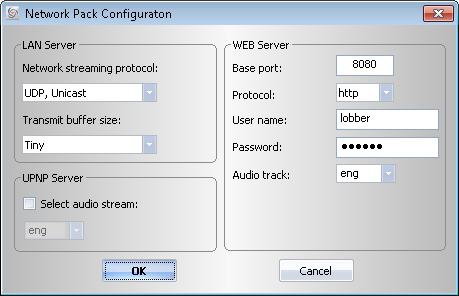
Figure 14: The DVBLink Network Server configuration on the living room PC. Before I moved on to the next step I wanted to prove that the Network Server was working correctly. Now as you can see from the screenshot above there is a Web Server included with the Network Server. Yes, you can use this to view your TV via a web browser anywhere in the world, so long as you allow the port configured through your firewall, and that your upstream bandwidth is sufficient to transmit the stream. So to prove the Network Server was running, I simply opened up Internet Explorer and browsed to the server on port 8080. 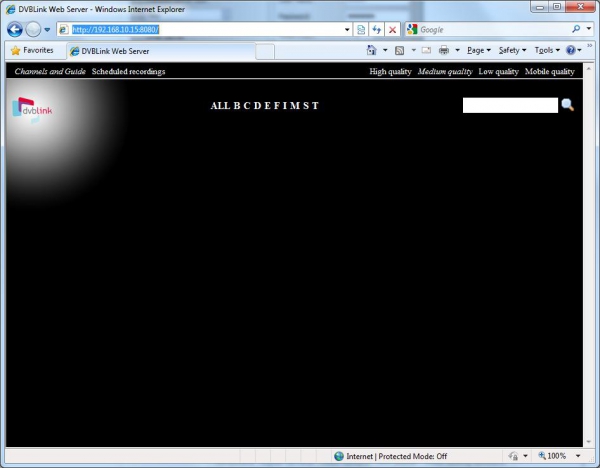
Figure 15: A shot of the web interface used when connecting to the Network Server via internet explorer. After logging in using the username and password I had specified in the intial Network Server setup, I was presented with the following screen. It's not exactly the nicest looking interface but it is functional. Clicking on a letter at the top middle I can view the list of channels starting with that letter. This lists all the channels available with that letter, and further selecting that channel displays a TV guide for that channel. 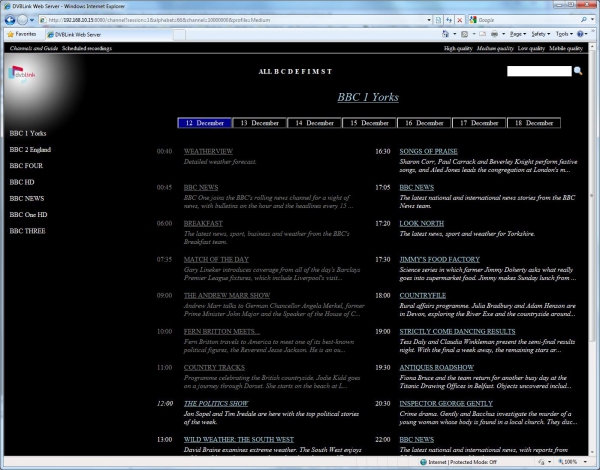
Figure 16: A shot of the TV guide via the web interface. Programs that have already completed have been greyed out, and clicking on these simple loads a description of the program. Clicking one of the active links takes you another page where a description of the page is found as well as the ability to view the program. I can also set the program to record, or even the whole series which is a feature I was not expecting and a very nice surprise! 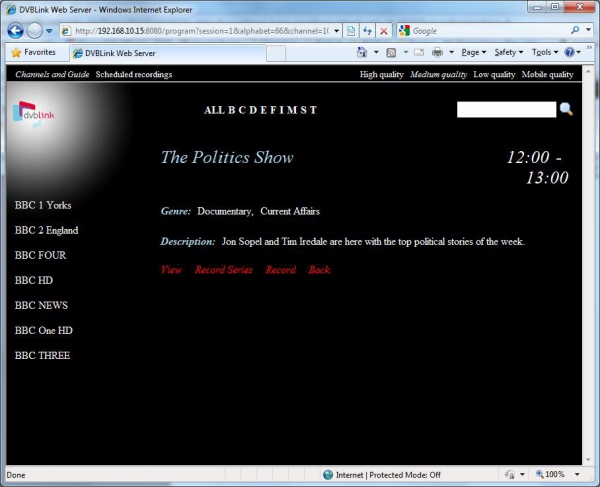
Figure 17: Shall I watch the channel or record it? Hmmm. At the top of the screen you can switch to view all the recordings currently scheduled on your Media Center, and you can also choose the quality of the TV signal when you want to view it. So leaving it on the default medium quality I selected the view option. Would it work? 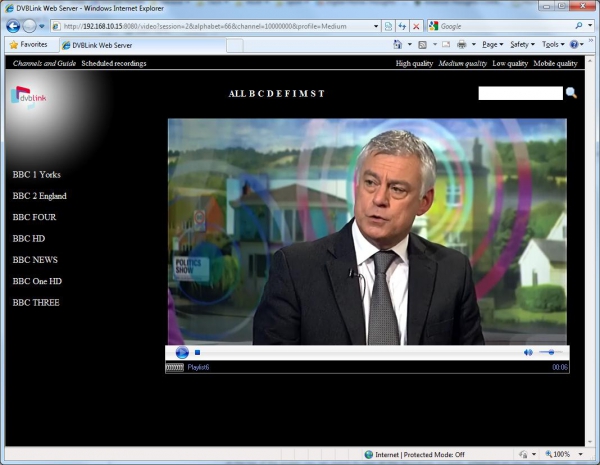
Figure 18: Watching live TV via the web browser. Success! After a few seconds buffering I have my TV available to me via the web browser. What impressed me most is how smooth it is with no judders, blockiness, and even the audio is perfectly in sync. Admittedly I am browsing via my local LAN, and not the internet, but with a fast enough upstream I am sure this would be just as smooth. Unfortunately I don't have a high upstream bandwidth and won't be able to use this feature, but it's nice to know I have when I do finally get one. I can even watch a different channel to the what is being watched on the media center pc in the living room. Having proved that the server part of the software is working I installed the network client software on my office PC. Once installed there is a reboot needed as it installs the drivers for the virtual TV cards. Once the PC had I rebooted I needed to configure the client to tell it where the server was located. 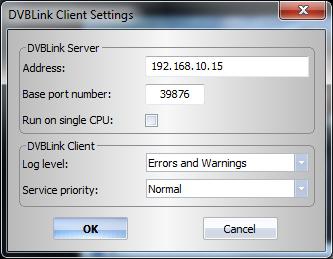
Figure 19: The DVBLink Client Settings which were configured on the office PC and bedroom laptop. I inputted the network address of the server PC downstairs and clicked OK, then checked the list of channels the client found. Satisfied they were correct I click OK on the next window too. The next step was a repeat of and earlier step as I find myself following the same procedure as I did to install the cards in the living room PC. Simply run the TV setup wizard where it finds the four TV cards, and accept the default options. Again there is no need to configure the tuners, or set up the guide as these are all imported from the server software. Once the TV setup had finished I went to the Guide option in Media Center to see if all channels were there and the details of all the scheduled TV. All present and correct, and a quick selection of a TV channel proves that it works and that I now have live TV in the office. Does it Work?Actually, it does, and it works surprisingly well. The pictures are clear and I can't tell any noticeable difference between the picture quality before when using the TV cards direct, and now while using the virtual TV cards via the DVBLink software. The Media Center PC's elsewhere in the house are the same, perfect picture, great audio and working TV guides. I can watch different channels on each, as well as record programs on each should I want to. The only limitation is you can only watch as different channels as long as there is a spare physical tuner. In my case I only have 3 tuners, so I can only watch three different channels, or watch two and record one. There have been a couple of niggles however. The major one is that it can sometimes take a few seconds to change channels. On average it takes 1-2 seconds to switch to a channel, but if I try to skip several channels at once then it can be longer, the worst of which was a ten second delay. I have have however adapted to this and if I want to change forwards or backwards more than one channel I simply switch to the guide, move to the channel I want and select it. This seems to bypass the delay that occurs otherwise. The other issue I have experienced is trying to use the office PC or the laptop when the living room PC has gone in to sleep mode. When this occurs Media Center displays an error saying there is no signal. To fix this I have enabled Wake on LAN on the living room PC, and when this occurs I send a magic packet to wake up the living room PC, then I need to restart the DVB Link Network Client service, and finally I can restart Media Center on the laptop or office pc. It would be nice if in future versions the network clients could check if the server is responding and send a magic packet if it's not. Overall, I am incredibly impressed with the whole DVBLink software setup. It installs smoothly without any problems, it works very well, and I now have TV in any room I want for a mere $50. It certainly beats needing to have TV cards in each Media Center PC, with cable laid to each room. Andy is the IT manager for a legal firm in Leeds, UK, looking after the servers, network infrastructure and mobile technology. This allows him to have fun with gadgets at both work and home of which he really has too far many. He has a keen interest in the outdoors, spending his weekends and holidays hiking, snowboarding or mountain biking. 
Do you enjoy using new hardware, software and accessories, then sharing your experience with others? Then join us on the Thoughts Media Review Team! We're looking for individuals who find it fun to test new gear and give their honest opinions about the experience. It's a volunteer role with some great perks. Interested? Then click here for more information.
|


 Threaded Mode