 Your Own Mobile Fax Machine with Wizcode PhotoCopy Mobile 1.4
Product Category: Imaging SoftwareWhere to Buy: Mobihand [affiliate]Price: $14.95USD. A fully-functioning 30-day trial version is available.System Requirements: WM5 or above; Works with touch or non-touchscreen phones; resolutions from 240x240 to 800x480. Requires phone/pda to have built-in camera and have approximately 5Mb of free RAM to run.Specifications: Uses approximately 1.5Mb of memory.Pros: - Simple to use, very finger friendly;
- Can produce single or multipage PDFs;
- Works in colour or b&w (best results are in b&w, depending upon light levels).
Cons: - Output is dependent upon the quality of the photo images -- there is no image enhancement capability built into the application;
- Only produces an image-imbedded PDF -- no OCR to translate content into text.
Summary: This is my kind of application. It does one simple thing, it does it well, and it's simple and easy to use. Wizcode's Photocopy Mobile turns your phone into a mobile photocopier/fax/scanner with the ability to convert an image taken with the camera into an emailable PDF document. Now, you can easily share those wonderful whiteboard ideas with the rest of the workshop, or send in that latest signed contract to head office, right from your phone! IntroductionEver been in a meeting where someone (maybe you?) is developing a great idea on the whiteboard and then you come to the end of the meeting and.... someone has to transcribe it down before the concept is lost. It's no fun for the designated 'secretary'. My solution has been to use my phone's camera to capture the board, then download it to my PC, clean it up, then ship it out to the meeting participants. The problem is, it's a multi-step process; the output is a JPEG and emails/MSWord get a little hairy dealing with pictures (especially two or three in a row); and there's no easy way to ensure the receiver gets them in the right order. Wizcode's Photocopy Mobile provides an easy, all-in-one solution, by combining the camera, PDF converter and email interface into one small application. InstallationOver the years, installation of Windows Mobile applications has become pretty routine. Wizcode PhotoCopy Mobile provides either a .CAB file which you copy to the device and install yourself, or the ActiveSync/Mobile Device Center .EXE file which you download to your PC and run from there. Wizcode also provides two versions of the software -- one for a touchscreen phone (previously called the 'Pro' version), and another for non-touchscreen phones (aka Smartphones). Both are available from Mobihand. Once you complete the installation, the software runs from the Programs menu. On the first run, Wizcode PhotoCopy will display the End-User Licensing Agreement (EULA) and then present a screen to input the registration code (if you have one). If you are running a trial version, subsequent runs of the software will present this registration screen with a countdown of the number of days left in the trial. Past the registration screens, you are presented with Wizcode PhotoCopy's main screen. 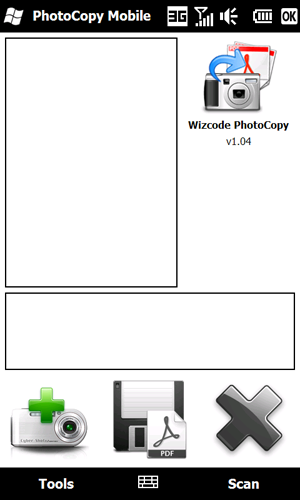
Figure 1: Here is the main screen of Wizcode PhotoCopy. Definitely not a complicated interface. The top and middle areas provide previews of the current and associated images in the document. The icons along the bottom are (from left to right): scan a page; create PDF; and remove image. Creating a DocumentThe first step is to create the images for your document. This is done using the camera built into your unit. Pressing the green camera/scan button in the lower right activates the camera application. As you can see from the example here, positioning, steady hands, and lighting are important to getting a clear image. Wizcode PhotoCopy does not include any image enhancement capabilities, so you pretty well have to get it right at shutter close. Wizcode PhotoCopy can easily handle colour documents, but for me, black&white worked best and provided the clearest results. If you camera has a flash LED, I would definitely recommend using it, in order to get the maximum amount of light on the subject. Once you've taken a picture of the first page, press the camera's return/OK icon and you'll be returned to Wizcode PhotoCopy with the image imbedded as the first page. 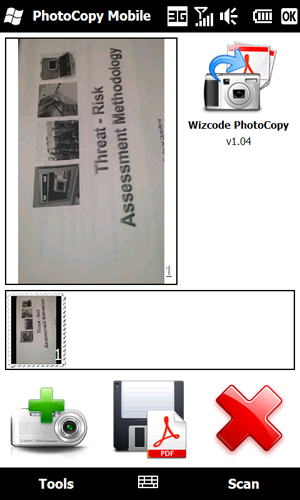
Figure 2: After taking a picture of the first page, or the first document, PhotoCopy updates the screen to show the current image (top), and thumbnails of how the images will appear in the final document (middle). If you are creating a multi-page document, just tap the scan button again to go back to the camera and take the next picture. There are options available in the Tools menu to re-arrange the images within the document structure. You can also add any other stored images on your unit, whether you took them with the camera or not. 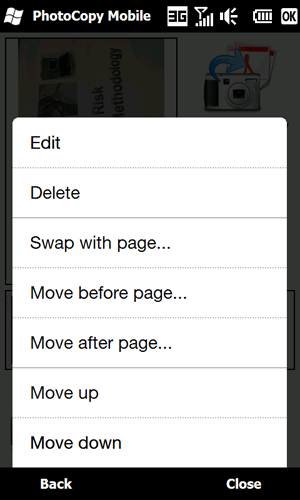
Figure 3: Here are the options available in the Tools/Images menu for moving images around in the document before the PDF is produced. The image to be moved is selected by tapping its icon in the thumbnails strip. The Edit function provides tools for cropping and rotating the image. If something went wrong with an image/page, just tap the big red X. Yea, I know, it feels a bit strange doing that, doesn't it? It feels like you're going to something majorly disastrous. 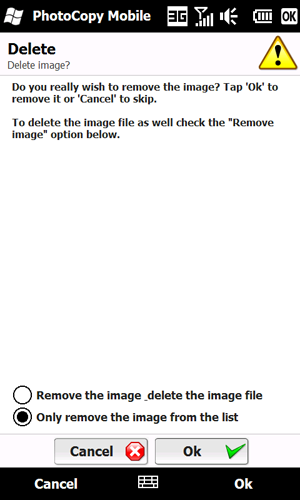
Figure 4: Tapping on the big red X on the main screen provides an 'undo' feature, if the picture taken didn't come out well, or you got the wrong image. Once again, this feature refers to the currently selected image. As you can see above, the Undo/Erase feature normally only removes the image link from the PDF, but you can optionally request that it also deletes the actual image file from the phone as well. Once you have everything you want in the document and in the right order, it's time to produce the PDF file. To do this, tap on the PDF/diskette (anyone remember those?) icon in the middle of the screen. 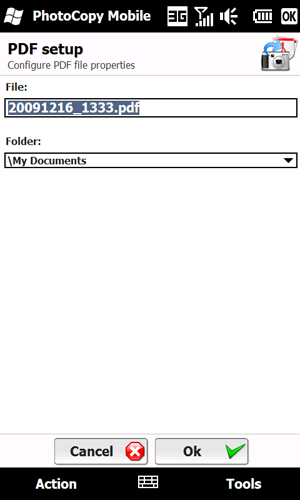
Figure 5: When producing the PDF, you can either select the default name (based on time and date) or create your own name, and you can specify where the document is to be stored. Although the examples shown here are to the main storage of the phone, it worked equally well if I sent them to an available storage card. 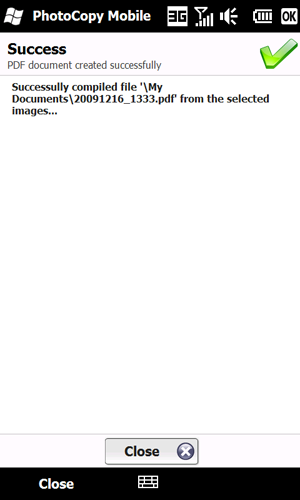
Figure 6: Creation of a PDF usually only takes a couple of seconds, depending upon the size and number of images to be processed. Wizcode PhotoCopy creates a PDF document of imbedded images only (i.e. the ones you took). There is no Optical Character Recognition (OCR) capability included to convert the content to machine-readable text, so documents can't be searched for words or phrases, nor can diagrams be altered. For my purposes of documenting discussions and diagrams, this is fine. Because it is basically an unalterable PDF, it could also be used for transmitting signed copies of documents, etc. Sharing with the WorldAfter the PDF is created, Wizcode PhotoCopy gives you the option to view the PDF or to share it with others via email. 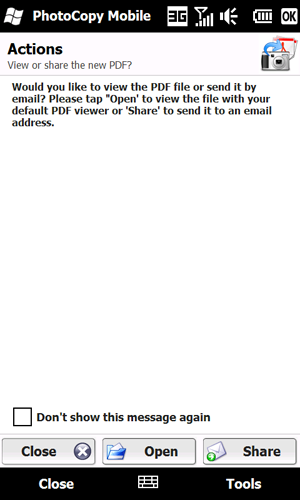
Figure 7: Deciding what to do with your document. There is an option to inhibit this message from being displayed, in which case Wizcode PhotoCopy assumes you want to just store the PDF and deal with it on your own later on. 
Figure 8: WizCode PhotoCopy also includes a copy of Adobe Reader LE for mobile units, so you can view the final product before you send it out. 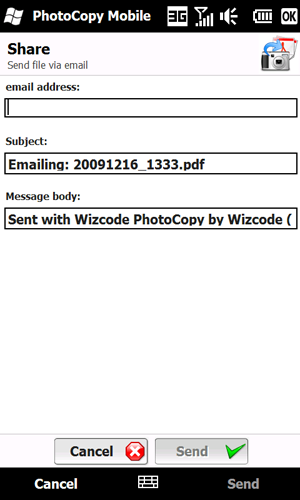
Figure 9: If you decide to Share your document, you can send the file via email to anyone you wish. (Note, this does require that you have an email account established on the unit). If you have multiple email accounts on your phone, it will utilize the Outlook outbound account server first, or the first email account created. Both the Subject line and Message body are modifiable, but are limited. I couldn't see any way to access the email addresses in my Contacts list from here, so you'll have to add the recipients directly. 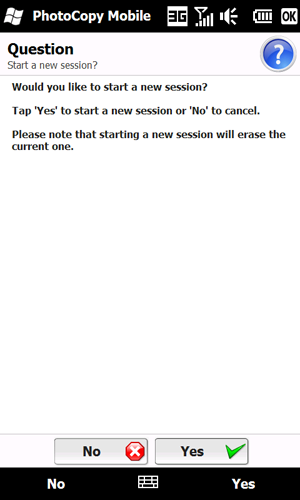
Figure 10: Once you've completed viewing and/or emailing your document, Wizcode PhotoCopy will ask if you'd like to create a new PDF (a new session) or continue working with the existing images to create a revised PDF file. ConclusionAs I mentioned before, I love this application for its simplicity. It does just one thing; has a very simple and easy to user interface; and does the job well. The biggest advantage for me is that it allows me to untether even further from my laptop/PC and be able to send participants documentation of their meeting, right after the meeting while the concepts are fresh. Now, if I could just find some way to have diagrams automatically loaded into MS Visio (TM) :-). Don is an Associate Director of Project Management and Systems Development with Fujitsu Consulting. He's been working with PDAs and Smartphones since the early days of the Sharp Wizard, iPAQ and Jornadas. As the Enterprise Mobility lead for North America, he works with clients who want to take their applications that one step further into 'mobility' by putting them right on the corporate phones. Do you enjoy using new hardware, software and accessories, then sharing your experience with others? Then join us on the Thoughts Media Review Team! We're looking for individuals who find it fun to test new gear and give their honest opinions about the experience. It's a volunteer role with some great perks. Interested? Then click here for more information.
DISCLOSURE OF MATERIAL CONNECTION
__________________
/drt
|


 Linear Mode

