 The Digital Wall Project: An Epic Tale
Before reading further, if you haven't read my initial article on this project (and the follow-up), please check it out for the background and design goals of this project. 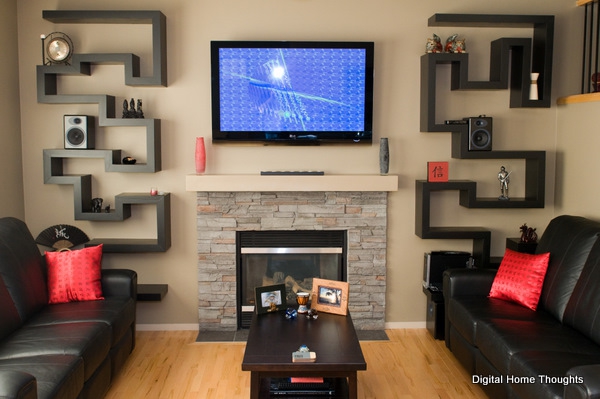
Remember the digital wall project I talked about in July 2008? In the latter part of 2008, it was finally completed: the results are shown above [high-res photo available]. I love how it turned out, and everyone who sees it for the first time has the same response: "Wow, that looks great!". Like any home renovation project, this one had several stages; the final stage was trauma recovery. The project as a whole was so drawn-out and frustrating that it's only months after it's finished that I feel I can write about it without spewing expletives on your screen. My hope is that by detailing the process, and results, anyone attempting a similar project will learn what to do - and what not to do, because I had never done anything like this before and have learnt a great deal from it. Let's get started! Stage One: Planning & Technology SelectionThe first stage was the planning stage: it involved me sourcing the professionals needed to complete the work. I might be able to tear down and re-build a computer with ease, but put a power tool in my hand and I'm much less sure of myself. We've done some minor home renovations, but I knew this one was beyond my admittedly basic skill level - so hiring competent people to do the job seemed like the smart thing to do. Little did I know this would prove to be more of a challenge than I thought! Both the carpenter and electrician we hired were family friends, so my hope was that because we knew them personally we'd end up with better results than hiring a stranger. It didn't work out that way, but that's part of all the "fun" with this project. The drywall guy I found, after much difficulty (see below), was a stranger. 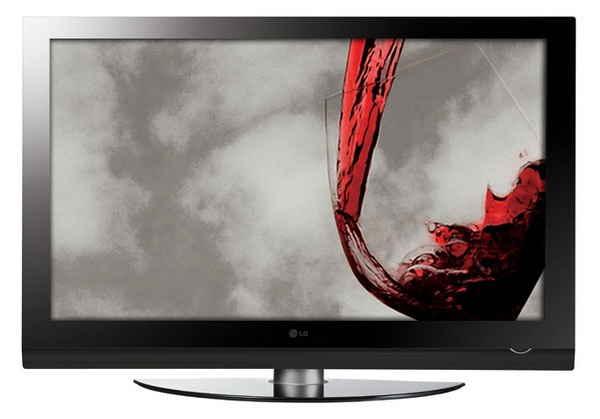
Figure 2: The LG 50PG70, the plasma TV I selected for this project. The other part of this first stage was selecting the technologies I'd use for the project. I was initially leaning strongly toward an LCD TV, a Sharp Aquos in particular, but after doing some further in-store comparison and research, I ended up purchasing a 1080p 50 inch LG plasma TV (50PG70). The black levels are superb on it, and given that it wasn't going to be powered up very often (it's our secondary TV), I wasn't concerned about the increased power draw of plasma over LCD. Other TVs on my short list, and within my price range, were the Pioneer Kuros, a 720p plasma set, and the Panasonic Viera, also a 720p plasma set (remember this is back in July of 2008). The Pioneer Kuros had delicious black levels and a great quality picture, but I was put off by being limited to 720p (the 1080p Kuros sets were far more expensive). In retrospect, the limitation of 720p probably wouldn't have been a bit deal. I think I got a little obsessed with getting a 1080p set and if I had to do it all over again I would have saved nearly $1000 and gotten the 720p version of the LG plasma. I'll talk more about my other equipment choices later on. Stage Two: The Electrician Does His ThingThe second step was the tear down: a screwdriver was all we needed to remove the simple black shelves we had hung on the wall. If only the rest of the project was that easy! After moving all of our furniture into the corner of our main floor, to give the contractors lots of room to work, the electrician showed up for the first part of his work: ripping into the wall. This part of the story is best illustrated by a set of stage-by-stage photos. 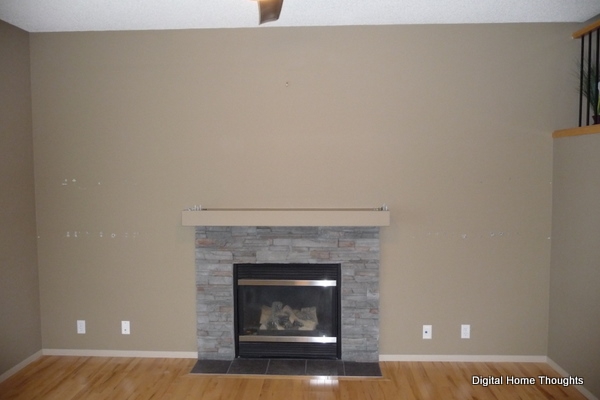
Figure 3: After we removed our shelves and moved our furniture into the corner, this is what was left. 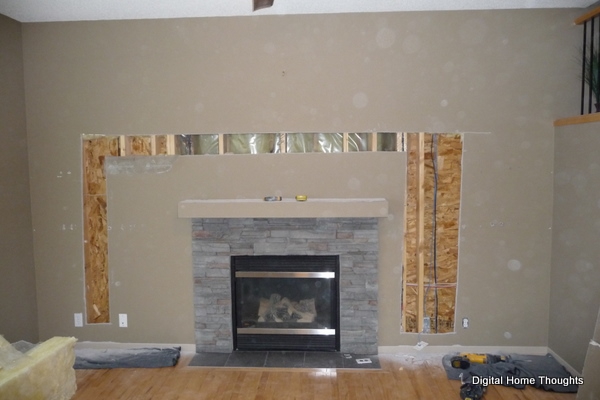
Figure 4: Drywall begone! There's no turning back now... 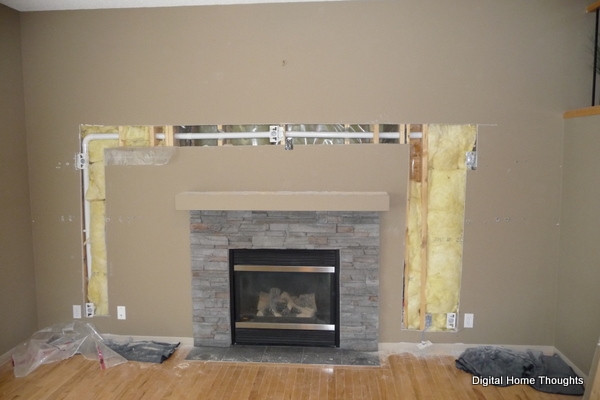
Figure 5: The Vacuflo tubing is mounted in the wall. We had discussed several plans with the electrician, and we determined that to give me the flexibility I wanted, running Vacuflo tubing inside the wall was the best course of action. It would give me the ability to run any sort of cable that I wanted, and while it wouldn't be as "pretty" as terminated wall-jacks, the panels would be completely hidden so it didn't matter much. The electrician quickly tore into the drywall, cut through parts of the studs required to run the Vacuflo tubing, and mounted the 2x8" piece of wood. The 2x8" was critical because we were going to mount the plasma TV at the centre point of the mantle above the fireplace, which happened to be in-between studs, so having the extra support was vital. It's important to point out here that the measurements we gave the electrician were checked and re-checked several times, and cross-checked with the carpenter who was building the custom shelves for us. Every inch mattered, so we made sure everything was measured properly and we assumed the electrician would follow our measurements. 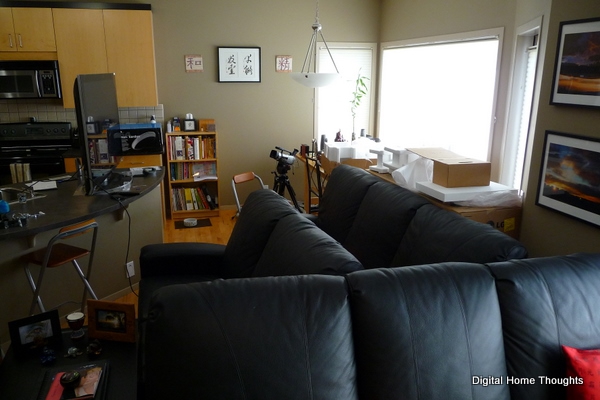
Figure 6: Our kitchen area was quite a disaster while this project was underway. Stage 3: The Dry-Wall Guys Do Their ThingIn July of 2008, the city I live in (Calgary) was in the midst of an economic boom. We're an oil town, so when oil prices are high money flows like water and construction projects are everywhere, putting people with trade skills in demand. I thought finding someone to do the drywall cutting, taping, patching, and sanding would prove to be easy - but it was anything but easy. I tried a few people that the electrician recommended, but none of them worked out due to the small nature of the job and how busy the contractors were. Some of you may be thinking "Um, Jason, it's just drywalling - can't you do that yourself?". I wasn't kidding about lacking do-it-yourself skills - I wanted to ensure this wall looked fantastic when it was completed, and I didn't trust my neophyte skills to do the job. At any rate, I ended up turning to Kijiji to find someone for this project. There weren't a lot of people to chose from, but I thought this was such a simple project, how could anyone screw it up? Because of that, I didn't ask for references from previous jobs. I really should have asked for references. 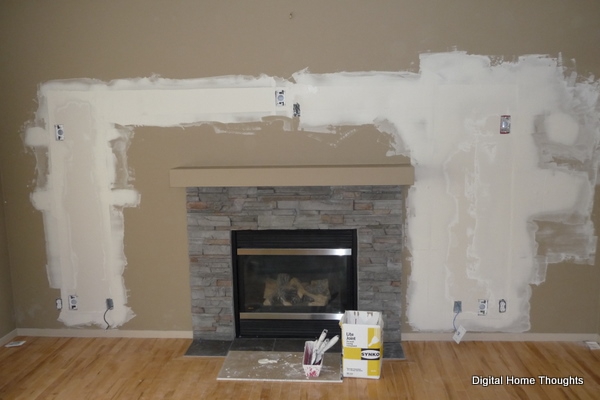
Figure 7: The drywall after the "professionals" were done with it. I should have been alerted by the fact that the two-man crew showed up with almost no equipment - not even a drop cloth to catch some of the debris they'd be creating. Initially it seemed like things were going OK, and other than dust getting everywhere, there were no real problems. Before they did the final sanding we covered as much of our couches as we could in garbage bags because I realized, belatedly, that they weren't using one of those vaccum-sanders that trapped most of the drywall dust. After they were finished I phoned my father-in-law, who happens to be a Journeyman painter, and hired him to paint the wall. Unfortunately he discovered that the drywall "pros" didn't mix their drywall mud properly and there were more than two-dozen spots that had air bubbles and couldn't be painted over properly. He had to re-mud and re-sand all the spots you see below before he could paint the wall. Thanks drywall guys, way to go. Professional fail #1. 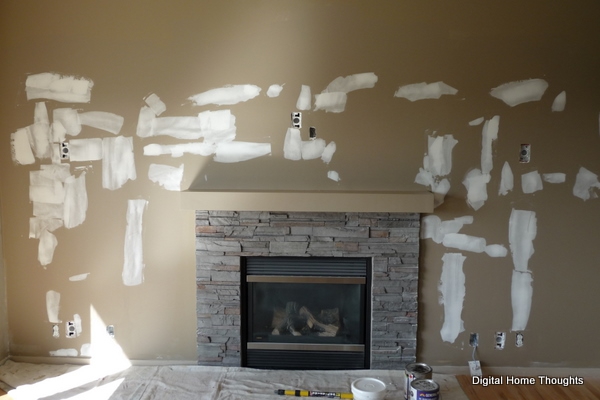
Figure 8: Just a "few" areas that need re-patching and re-sanding. 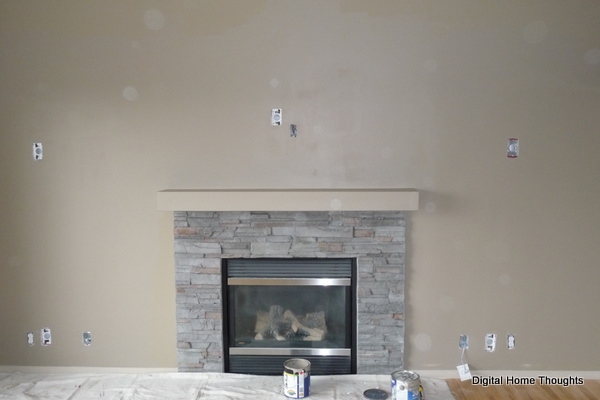
Figure 9: After the patches were painted over we realized that the paint we thought was a match was a fair bit off. The whole wall was going to be painted with the new colour, but that meant it would be a different colour than the adjoining walls. We ended up having to re-paint the whole main floor of our house, but after seven years it was due for a new coat anyway. In the software world that's called "Scope Creep". Stage 4: Matt & I Do Our ThingA good friend of mine named Matt happens to have a fair amount of experience with mounting wall displays, so I was confident with his help I get that lovely LG plasma TV up the wall without making a complete mess of things. It didn't quite turn out that way, but I swear it wasn't our fault! I bought the nicest, most expensive TV mounting bracket that the electronics store had. It would allow me to move the TV left, right, forward, and backward. Sounds cool, right? We measured the wall, and the mounting plate for the bracket, several times and started drilling. The first surprise was that we didn't find wood where we expected to. The 2x8" that the electrician was supposed to install? It seems that he decided to install a 2x6" piece of wood instead. Professional fail #2. So we lost two inches of space there. After we got that part figured out, which involved drilling a new hole in the steel mounting bracket, we mounted it without much trouble. 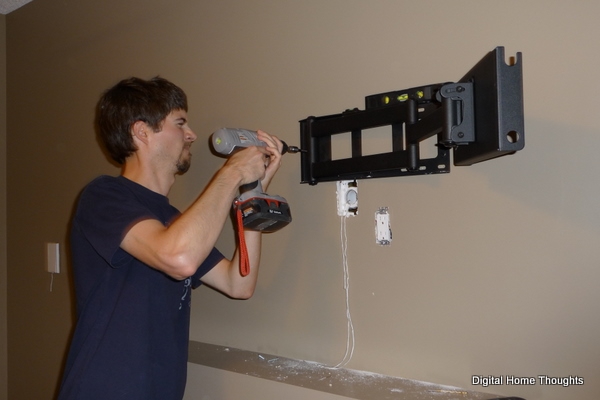
Figure 10: Matt and his drill. His drill is way cooler than my drill. It has more gigawatts...or something. 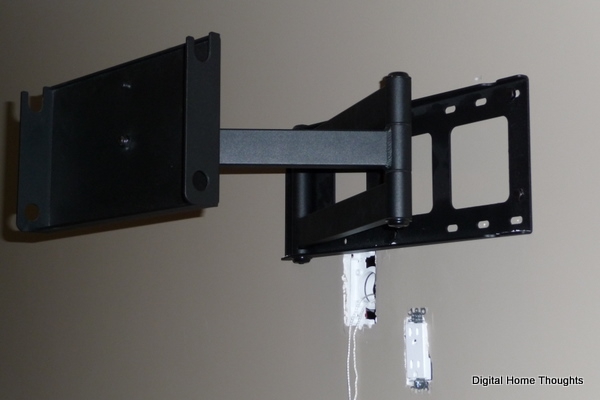
Figure 11: After we got it mounted we put some weight on it to ensure it would support the TV, and it was locked in there solidly. The ugly electrical outlet and Vacu-flo outlet would be covered by the TV, so I didn't put any cover plates on them. 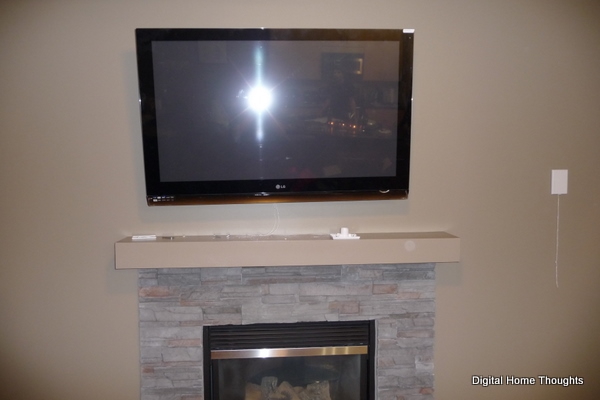
Figure 12: Umm...dude? That doesn't quite look right! After we put up the TV, which was a bit of a heavy beast, we immediately noticed we had a problem: it wasn't centred on the wall! It was several inches too far to the left. How did that happen you might ask? Turns out that what we didn't realize was that while the mounting bracket was perfectly centred on the wall, the part of the bracket that attaches to the TV, when pushed back to it's starting position (closest to the wall), is off centre. There's no indication on either bracket as to where the "true" centre point is, nor is there any mention of this in the article. Measuring the true centre point was quite difficult, so I got fed up and simply returned the bracket. Professional fail #3 for the salesperson not telling me this wasn't a good bracket to use over a mantle (which I told him about). In its place, I purchased a very simple mounting bracket, something that was easy to align with the centre of the mantle. 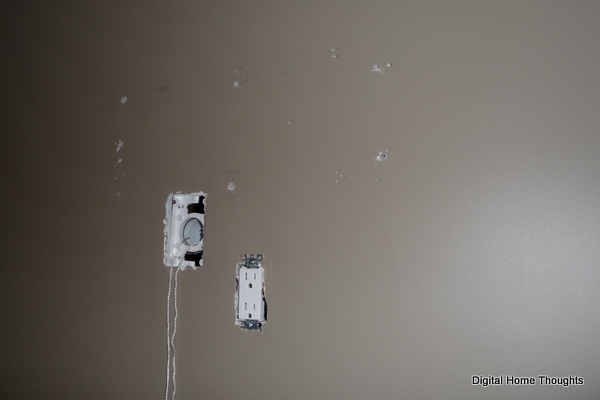
Figure 13: The ugly mess we left on the freshly painted wall once we removed the bracket. Stage 5: The Carpenter Does His ThingAs I mentioned earlier, the carpenter we hired was a family friend, and as a master carpenter we felt he had the skills to pull off the shelves we wanted. In the weeks leading up to this project, we met with him twice and we sent emails back and forth - he came up with a design, we modified it a bit to make room for the speakers, and we came to an agreement on the final design. We were excited to see the final design, and paid him a deposit up front. 
Figure 14: Look at the size of that shelving unit. Wow! When the shelves arrived and were being installed, at first glance they looked fantastic - exactly what we had envisioned. The carpenter did a great job of securing all the pieces together, making it look like one continuous flow of wood - and they were designed to hang on the wall without visible support above or below. When the shelves were being attached to the wall, the carpenter informed me that he couldn't mount the left-hand shelving unit at the height we requested - which matched the shelving unit on the right - because the electrician had mounted the Vacuflo panel 1.5 inches higher than it was supposed to be. Not having any other choice (the right shelving unit was already up), I authorized him to mount the left shelving unit at the necessary height. Professional fail #4. Thankfully, it's not noticeable - but it's irritating to know that the electrician decided to get "inventive" with yet another of my measurements. 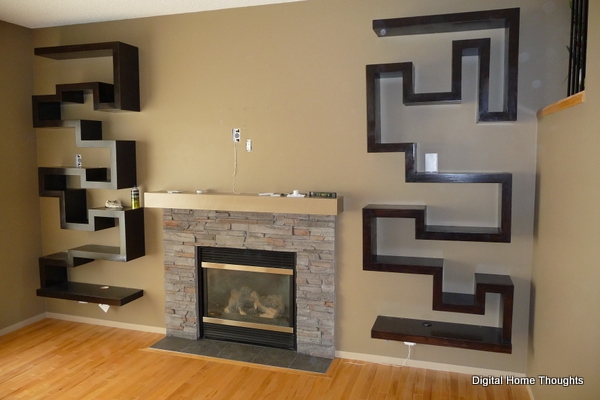
Figure 15: They look good, right? Well... I didn't look closely at the shelves while they were being installed because I didn't want to get in the way. Once the shelves were up, I took a closer look at them, and grew a bit concerned. The finish was supposed to match our coffee table - a very dark brown. I knew it wouldn't be a perfect match, but an approximation would be good enough. The colour wasn't the problem - the lack of a uniform finish was. In dozens of spots all over the shelves, all in very visible locations, the finish wasn't even. This wasn't a nice woodgrain showing through, it was the finish lifting and getting smeared. I know nothing about finishing wood, but I didn't think that was normal. 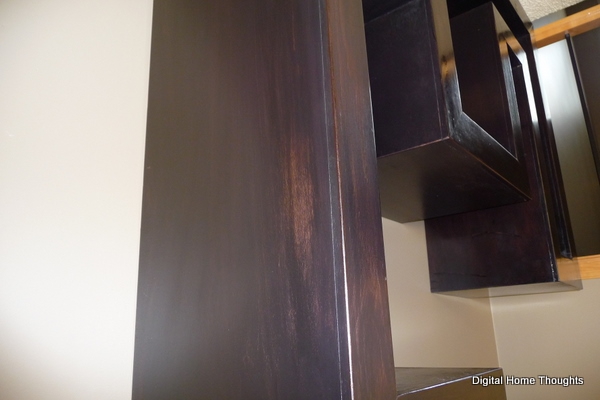
Figure 16: One of the man spots where the finish was uneven. Equally noticeable was that the shelving unit on the right wasn't mounted straight. The entire middle section was tilted upward, and quite obviously so - the whole thing was torqued clockwise, likely from the pressure the design was exerting upon itself. In fact, in the upper portion of the left shelf, the narrow vertical portion wasn't evenly spaced from top to bottom. There were also numerous spots on both shelves where the nails were popping up slightly, and knots in the wood that were improperly filled. So from ten feet away the crooked shelf was obvious, and up close the flawed fit and finish was obvious. Professional fail #5. The carpenter came back and said that we were "eagle-eyed" for noticing the crooked shelf and insisted it wouldn't be obvious to anyone else. When my friend Matt saw the shelves for the first time he asked if we knew one was crooked. We even bought a new level in case our old one was dysfunctional. The carpenter came back again to discuss the finish, and he explained that he had never stained anything that dark before, and the store he bought the stain from had told him that doing a brown stain first, followed by a black stain, was the right approach. They also told him that the sealing top coat he used was compatible with the stains he used - it wasn't, because as he sealed it, the stain was being lifted. He admitted to us that he wasn't happy with the finish, but he didn't know what to do about it. From our point of view, we were paying him for the product, not the store that sold him the stains, so we held him responsible for delivering an acceptable product. After a month of discussions and negotiations, we informed the carpenter that he would not be receiving the remainder of his payment for the shelves until they were mounted on the wall straight, and the finish was improved. We called in my father in-law, who also happens to have experience working with wood. In the end the only realistic solution for us was for him to paint the shelves black. We'd lose the look of the wood grain, but the stain was so dark you had to be six inches away to see the wood grain anyway. To the credit of the carpenter, he covered the cost of hiring my father in-law to paint the shelves, and in the end they looked quite good painted a semi-gloss black. 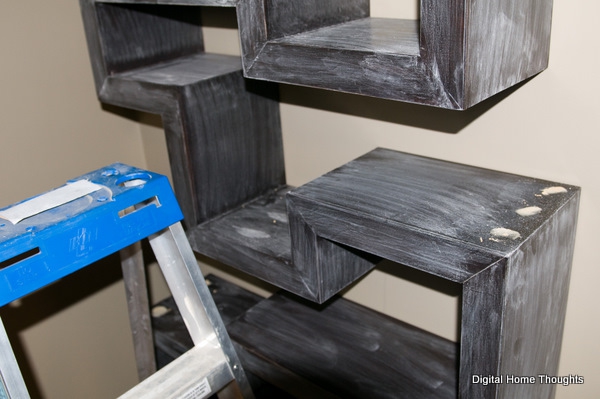
Figure 17: Before the shelves could be painted, the finish had to be roughed up with sand paper (so the pain would absorb) and the various nail pops and wood knots had to be filled and sanded. Once the shelves were painted, it was time to implement the technology elements. Stage 6: I Do My ThingI spend quite a bit of time researching the best equipment to get, so by the time it came time to purchased I knew what I wanted. I was such a fan of the AudioEngine A5 speakers when I reviewed them that it was a no-brainer to use them for the digital wall - in black, naturally. Not having to fuss with an amplifier was what tipped me in favour of the AudioEngine speakers over the Orb Audio speakers. One of my requirements was that the speakers have two audio inputs: one for the networked media player I'd be connecting, and one for the computer I'd be connecting. Why two? Having to fire up a plasma TV to start Windows Media Player on the computer to listen to music seemed more than a little silly. The inputs on the A5 speakers are plain old 3.5mm jacks, so I was going analog all the way. Sure, a SPDIF input would have been nice, but I have zero complaints about the quality of the audio. 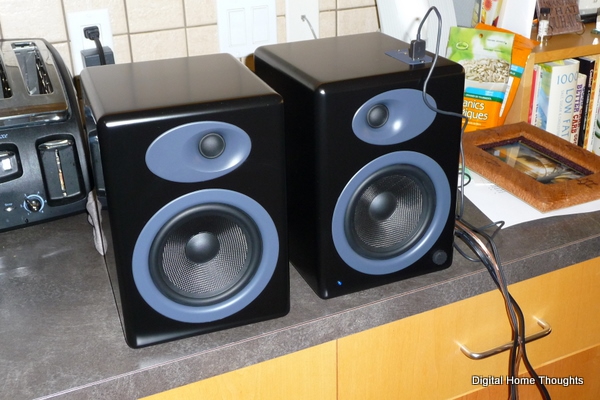
Figure 18: The great-looking and great-sounding AudioEngine A5 powered speakers. The flash on the camera made the grey look lighter than it really is. They look almost completely black. I wanted a sub-woofer to go alongside the A5 speakers, so my natural choice was the AudioEngine A8 sub-woofer. It was a bit pricey at $350 CAD, but after purchasing it I tested it with a variety of music and it sounded superb. Tight, thumping bass with nary any distortion - until I removed the legs. The tall, pointed plastic legs (see Figure 19) screwed into the bottom of the sub-woofer, but in doing so it made the unit too tall to fit under my bottom shelf. That's right: with all my measuring, I neglected to measure the space required for the sub-woofer. I didn't purchase it until after the shelves were up, so I didn't put much thought into that part of the project. The A8 sub-woofer is down-firing, so I needed a certain amount of clearance between the floor and the speaker. I tried finding substitute legs, but struck out - and the screw-holes needed to be air-tight or the sub-woofer would start to rattle. You know those "fuzzy feet" you put on the underside of your chairs if you have hardwood floors? I put one over each screw hole, which made the holes air tight, and stacked several more on top to raise the sub-woofer off the ground. It's not pretty, but it works, and you'd have to be laying on the ground to see how silly they look. Problem solved! 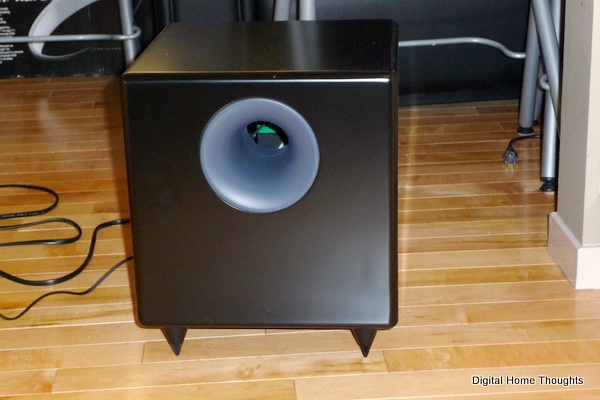
Figure 19: The AudioEngine A8 sub-woofer. Little did I know those pointy plastic legs were making dents in my hardwood floor. When it came to picking what would power the whole thing, I entertained a few different options - a Media Center Extender, a Blu-ray DVD player, a networked media player, etc. At one point I was looking at an HP TV that had the Media Center Extender software built-in - but I knew that I wanted to have a Web browser as well. I ended up going for the slightly less elegant solution, but all in all a much more powerful one: a full-fledged PC. I initially purchased a Dell Studio Hybrid computer, but after two different units (the second with a very fast CPU) and weeks of testing, it came down to one thing: the Studio Hybrid computer simply didn't have the GPU power I needed to have a fast and fluid experience using Windows Media Center. I tried every tweak and hack there was to try and improve the performance of the machine, but in the end the Intel GMA 4500 GPU simply wasn't up to the task. Everything else about the Dell Studio Hybrid was perfect - the size, the silence, the design - but the graphics performance sucked. I opted instead for an HP Slimline computer purchased from my local Best Buy. For only $100 more than what I paid for the Dell Studio Hybrid, I went from a two-core Intel CPU to a four-core AMD CPU, doubled the RAM (4 GB), doubled the hard drive (500 GB), added a combo Blu-ray/HD-DVD player, and most importantly, I had an NVIDIA 9500 GS graphics card with 512 MB RAM and HDMI out powering the whole thing. Windows Media Center was a smooth as butta'! What I gave up by going with the HP Slimline was size - it's taller than I wanted it to be - and it's nowhere near as silent as the Dell Studio Hybrid. It's not loud, but it's not completely silent either. 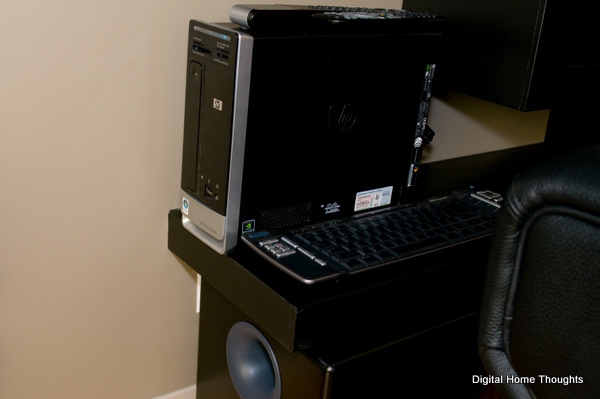
Figure 20: The HP Slimline computer that powers the whole experience. I use an infrared "Microsoft Remote Keyboard for Windows XP Media Center Edition v.1.0" (I kid you not, that's the product name) as both the keyboard and mouse. 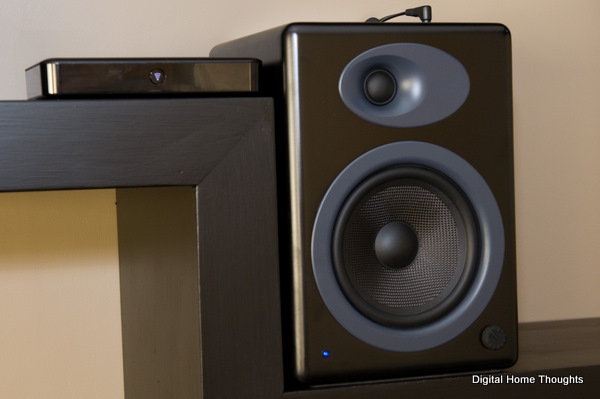
Figure 21: On the left, the Logitech Squeezebox. On the right, the AudioEngine A5 speaker. I need to find a right-angle 3.5mm jack cable that lays flatter. My previous method of playing audio was my much-loved Roku Soundbridge M2000, a product that has now been discontinued. It worked amazingly well, and was completely reliable, but it was too large to fit on the shelf alongside the AudioEngine A5 speaker on the right-hand shelf. I needed a new solution. After looking at several options, I landed on the Logitech Squeezebox Duet. It was very small, and the idea of having the LCD screen in the remote control seemed like a slick idea. My review of this product is forthcoming, but in a nutshell the Squeezebox Duet is an amazingly powerful, but often-times quirky player that made me crave the simplicity and reliability of the Roku M2000. The Squeezebox delivers great-sounding audio however, and after getting it configured it's working really well. Or it was until I swapped out my Linksys WRT54G router for a Linksys WRT610N - it's done a few funky things since then, even though it's connected to the 802.11g network rather than the 802.11n network. I've had to do three factory resets because the remote gets into a weird state where it looks like it's fully connected, but it won't play any music. Look for more details in my review - when the Squeezebox works, which is most of the time, it works really well...but when it doesn't work, it's a little frustrating. Stage 7: Fit, Finish, Testing, LearningAt long last, slightly over four months after I started this project, it was finished. It had a lot of frustrating elements, but in the end I'm ecstatic over the end result. The pictures say it all, so have a look. 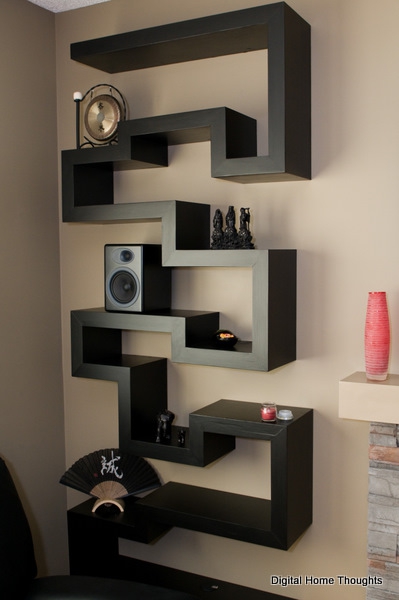
Figure 22: The left-hand shelf. 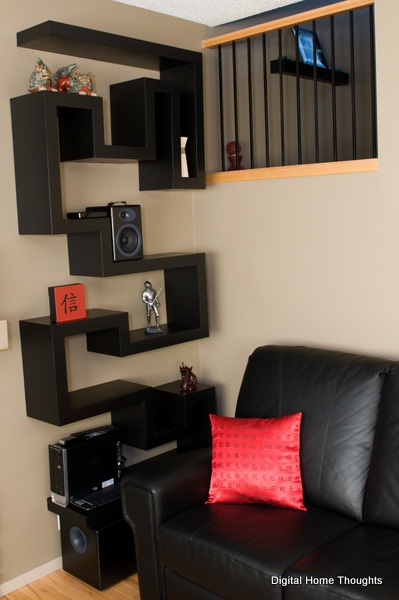
Figure 23: The right-hand shelf. 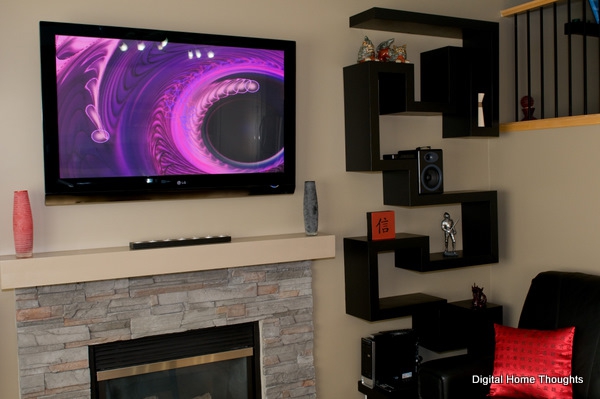
Figure 24: Playing some music off the HP Slimline computer while the Windows Media Center visualizer is dancing along to the beat. 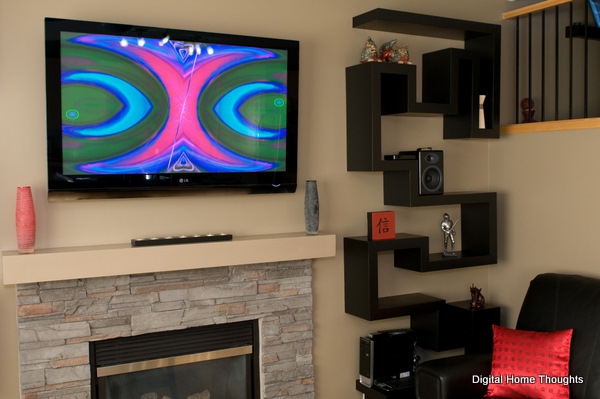
Figure 25: Another shot like the one before, just for fun. 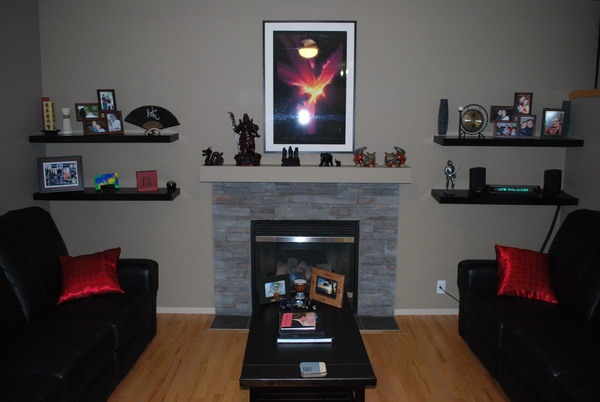
Figure 26: My wall before the project started.
Figure 27: My wall after the project was finished. So would I do anything differently? Besides hiring different people to do the actual work, my one and only regret is that I didn't put the plasma TV lower on the wall. In day to day use when we're sitting on the couch, it's about four inches too high. It's not hard to see by any means, but we've noticed that we have to angle our heads up slightly, which isn't ideal. My friend Matt and I are going to take the TV down and explore some options for moving the mounting bracket down, so we'll see if we can lower it without having to make too big of a mess. I'm also completely baffled by the lack of Windows Media Center-compatible music visualization software that's compatible with 64-bit Windows Vista. My all-time favourite music visualization plug-in is G-Force, made by SoundSpectrum, but even with 64-bit Vista being on the market for over two years, they still haven't released a version of their software that I can use on my HP Slimline computer. The visualizations that Microsoft bundles are completely lame and outdated - they haven't been changed since Windows XP. If anyone is aware of a music visualizer I should try, please let me know. And that wraps up this epic tale! There was a lot of learning involved for me because I'd never done anything like this before, but despite a few bumps along the way, I'm pleased with how the final result looks. It's a definite conversation piece when people see it for the first time, and it's highly functional for our day to day use. Over the coming years it will be easy enough for me to swap out and upgrade components if need be, all without impacting the overall design. I'm very happy indeed with my digital wall. Jason Dunn owns and operates Thoughts Media Inc., a company dedicated to creating the best in online communities. He enjoys photography, mobile devices, blogging, digital media content creation/editing, and pretty much all technology. He lives in Calgary, Alberta, Canada with his lovely wife, and his sometimes obedient dog. He hopes he doesn't have to move to a new house for many years, because he likes his digital wall a lot. 
Do you enjoy using new hardware, software and accessories, then sharing your experience with others? Then join us on the Thoughts Media Review Team! We're looking for individuals who find it fun to test new gear and give their honest opinions about the experience. It's a volunteer role with some great perks. Interested? Then click here for more information.
|


 Threaded Mode