 Zune 80 Surgery: My DIY Battery Replacement
About a month or two ago, I started to notice that my beloved Zune 80's battery life was dwindling. I have several daily podcasts that I subscribe to, and in the last couple of weeks, I've needed to plug the Zune into an AC adapter just to keep it alive long enough to get through my podcasts. The other day, it finally quit for good. I was listening to some John Prine at work (an artist I had never listened to, but was able to sample because of my Zune Pass). The Zune made a subtle "pop" sound in the headphones and went dead. When I plugged it into my computer, the screen showed the battery charging icon, but never would boot up. It just stayed in an endless state of battery charging. I bit the bullet and ordered a replacement battery from RapidRepair ($24.99). I chose overnight shipping since it was only one dollar more than standard shipping (huh?), and the battery arrived right on time. Tonight, I did the surgery.
To take the Zune apart, you first need to remove the small plastic cover on the top of the device. It just snaps in place, so a small screwdriver and some gentle prying will pop it right off. Under the cover, there are two of the smallest screws you have ever seen. They are T4 screws, and I didn't have a T4 driver. Undaunted, I tried the smallest flathead screwdriver I have, (from a jeweler's tool kit - tiny), and was able to remove the teeny screws. The next step is to pry the case open. This must be done very, very carefully to avoid breaking any of the plastic clips that hold the two halves together. I used a small plastic pot scrubber to create a gap between the halves and then slid it around the edges, gently pushing on the plastic clips as I went. It wasn't easy, but the back finally came loose and I was to remove it. The first thing you'll notice when you open up a Zune is that there is a lot of stuff crammed into a small area. It is very tight in there. I pulled the hard drive up and over, being careful not to damage the ribbon cable connecting it. There is a lot of tape holding things in place, and once I peeled it up, I was able to see where the battery wires were soldered to the board. I could see that my old battery was struggling. It was bloated and noticeably fatter than the new, replacement battery. 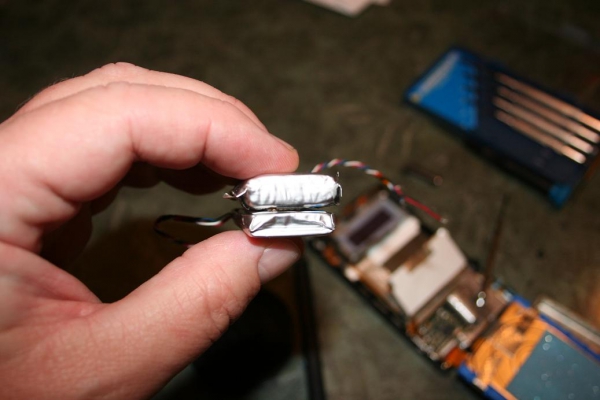
Figure 1: The old battery (top) had puffed up like a balloon - an obvious sign of a dying battery. The new battery (bottom) is thin and full of life. I felt a little intimidated when I saw the small area I had to maneuver with my soldering iron. I took note of which wire was connected where, since I have the memory of a rock. Once my iron was hot, I carefully heated each wire while gently pulling up to release the wire. With the old, bloated battery free, I was now ready to attach the new battery. 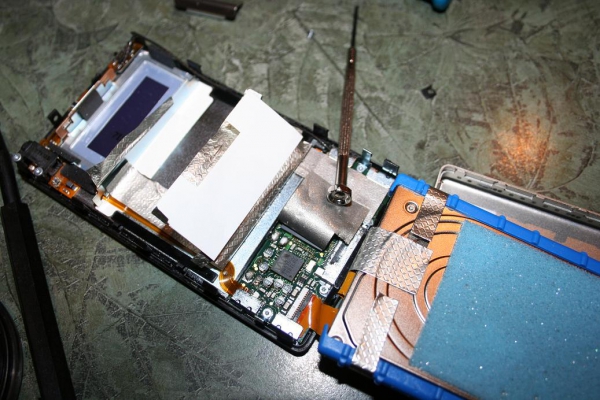
Figure 2: With the hard drive laying off to the side, I was able to unsolder the four wires. With the battery removed, I was ready to try installing the new battery. I very carefully soldered the four wires into place. This was tricky because of the small space and the tiny wires, but I was able to get all four securely attached. 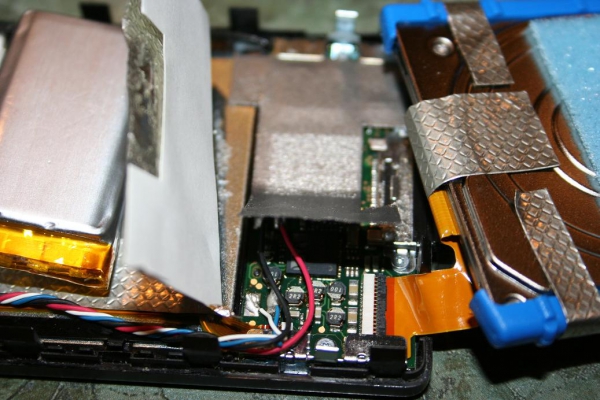
Figure 3: The new battery is attached by soldering four wires to the board; blue, white, red and black. The nice thing about the Zune is that you can test it out without having to put it all back together again. I plugged in my AC adapter and hoped for the best. After a few seconds, I saw light. I turned it over and saw the Zune booting up. Success! 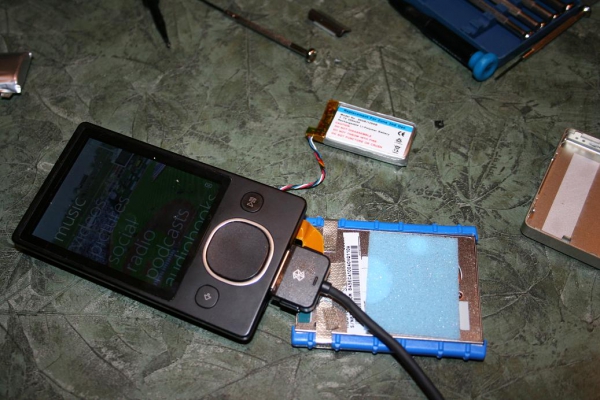
Figure 4: A quick test showed signs of life! Success! Unfortunately, the life wouldn't last, which sent me into a whirlwind of panic. I started to put things back in their place, and noticed that the screen had gone dark. I tried everything I could think of to reassure myself that things were still working. Lock. Unlock. Press and hold Play. Unplug. Plug back in. Nothing. I got worried. I checked my solders and noticed that one didn't look very secure, so I re-soldered it. I plugged the AC adapter in, and light! Once again, I started putting it back together, and... nothing. I decided to let it sit on the charger for a bit to see if it just needed some juice. I played Beatles Rock Band for about 45 minutes, checked my Zune and... nothing. By this time, I'm getting really worried. Once again, I pulled everything apart. Once again, I re-soldered two of the wires. Once again, I plugged in my AC adapter, and... light! I watched it boot up, moved around the menus, played some music - all with the guts hanging out. I decided to leave it plugged in and playing as I put it back together so I would know that it was still working. I stuck all the tape back down, placed the hard drive back in its cozy spot, routed the battery wires and taped the battery back down. Still playing. I snapped the back on, and replaced the tiniest screws on the face of the planet. Still playing. I snapped the plastic cover back into place. Still playing. The replacement battery was as dead as could be. I'm going to assume my connections weren't quite secure enough, but also that the battery just didn't have enough juice. Everything's back together, and it's been charging for about an hour now, and my battery icon just turned green.. Here's hoping I get good battery life from this baby. At least until the 15th when she gets replaced. Ron Hostetter is a software sales engineer by day, a gadget lover by night. He has worked in the IT field for over 20 years and loves reading about and playing with technology. He lives in Kansas City, Missouri with his lovely wife, his son and daughter, and their two dogs. He enjoys playing guitar and watching the Kansas City Royals, both of which he finds very frustrating. 
Do you enjoy using new hardware, software and accessories, then sharing your experience with others? Then join us on the Thoughts Media Review Team! We're looking for individuals who find it fun to test new gear and give their honest opinions about the experience. It's a volunteer role with some great perks. Interested? Then click here for more information.
|


 Threaded Mode