 Adobe Photoshop Lightroom 4 Review
Product Category: Photo Post Production and Library SoftwareManufacturer: AdobePrice: US$149 for Full, US$79 for Upgrade.System Requirements: For Windows: Intel® Pentium® 4 or AMD Athlon® 64 processor, Microsoft® Windows Vista® with Service Pack 2 or Windows® 7 with Service Pack 1, 2GB of RAM, 1GB of available hard-disk space, 1024x768 display, DVD-ROM drive, Internet connection required for Internet-based services. For Mac OS: Multicore Intel processor with 64-bit support, Mac OS X v10.6.8 or v10.7, 2GB of RAM, 1GB of available hard-disk space, 1024x768 display, DVD-ROM drive, Internet connection required for Internet-based services.Pros: - Easy to use but powerful workflow
- Good results are fast to achieve
- For Nikon users: Proper colours, finally!
- US$149 price point is hard to ignore
Cons: - Slow, slow, slow. Performance issues are present
- Expects to be the centre of your workflow; stepping out of it can make things awkward
- It is slow. It bears repeating. Are you sure you want to use that D800 with this?
Summary: Adobe's Lightroom has reached version 4, and we take a look at its two main modules, and how it works for one of the last holdouts against it. There are some performance issues, but it is capable of some great results. The performance issues cannot be overlooked that easily however, and it does cost the software some points in overall usability. The new price point makes it a relative bargain for many, however. IntroductionAdobe's Lightroom was created as a response to Apple's Aperture, which combined image cataloguing and viewing with a non-destructive image editing portion. This combination has proven to speed up and integrate workflows for many a photographer. Now with Lightroom reaching version 4, how does it fare? A note about the review and reviewerSince Lightroom 4 is a fairly deep and complex piece of software, I will not be going through every little thing that is present. Instead, I will review the software as how it works for me: a photographer who has been using a hodge-podge of other tools (namely Faststone Image Viewer, Nikon Capture NX2, and Photoshop CS4) to view, select, tag and edit photos, and add keywords to them. My current standard workflow is as such: - Manually copy photos from the day's shoot to a new folder with the appropriate name.
- Use Faststone to tag selected photos.
- Open tagged images in Capture NX2 for basic edits.
- Image is opened in Photoshop as a 16 bit TIFF for more complex processing.
- Web resizing and keywords are then added in Photoshop
It sounds a bit tedious but, in practice, it has served me well enough. Let us see if Lightroom 4 can replace most of this workflow! When working, I use the keyboard a lot, moving my hand off the mouse whenever possible for greater efficiency. So if I say something is awkward in practice, it means moving the cursor to one point, clicking, then moving back, then clicking, and repeating that process. User InterfaceThe user interface in Lightroom is pretty consistent. The top part shows the different modules of the software and the bottom part the filmstrip, a horiontal presentation of the photos and videos in the current catalogue. The left and right change based on the module selected, with the left showing previews and file navigation or templates, and the right containing the settings for the module, which is where most of the actions are performed. All four parts can be minimised to extend the real estate of the centre portion. The centre, of course, is the main working area, showing the current task being performed which, again, changes based on the selected module. 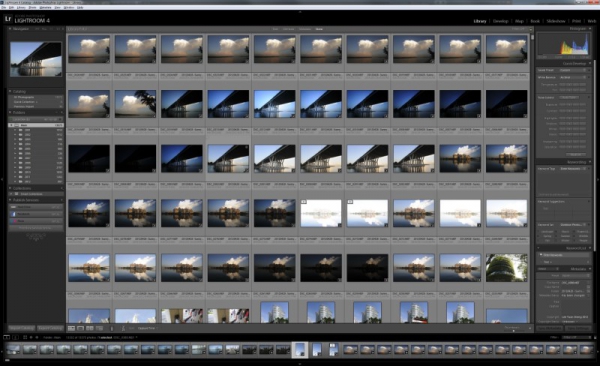
Figure 1: The basic view in Lightroom 4. If you have more than one monitor, you can set the other monitors to act in a number of ways. I have a two monitor setup myself so, for me, the second monitor is set to either the enlarged image preview or to compare two or more images while I work in the main monitor. Another thing I do quite like is the pop-up notifications when undos/redos are done. It gets my attention, and tells me that the CTRL-Z you just pressed did something, compared to the times I have missed an undo in other editors before. Overall, it is a decent user interface, and I never had any real major complaints working in it. As with any software, learning the keyboard shortcuts is easer than moving the mouse pointer all over the screen.
The Library ModuleFrom what I can tell, the Library and the Develop modules are where photographers will spend the most time in. We will take a look at the Library module first and how it does the job of viewing, tagging and organising photos. The Library by default presents all your photos in the current catalogue in a thumbnail grid view, which can then be sorted and filtered in just about any way. My own preferences have it sorted by date and time, in descending order, so the newest photograph is at the top. It is here where I run into my first problem. Previously, I shunned Lightroom because while it was a bit slower as a viewer/library program compared to say, Picasa or Idimager, it was drastically slower than purpose-built image browsers like Faststone Image Viewer. Back then I thought it might have been due to my slightly long-in-the-tooth system so I continued using an image browser instead. Fast forward to 2012, and while my current slightly overclocked Intel i7 920 with 12 GB of RAM might not be the fastest today, it still is better than what your average photographer uses and I expected a decent experience. Except I did not. Everything I did in Lightroom 4 made the computer stutter a little; selecting a photo, scrolling through the library, switching modules, the list goes on. The hard disk light was constantly blinking with each click, scroll, and action that I performed. Background MP3s would skip if I overdid something, like scrolling too fast through the library, or selecting an image before the preview finished rendering. There is also a certain slugishness as it seemed that the software retrieved the metadata and thumbnails every time I scrolled a few pages back or forward. I went on an extended Google search to find out about the problem. Amidst all the other moaning from early adopters about Lightroom 4, I found a few tips, including moving the scratch disk to an unused drive and using 1:1 image previews. The end result was little improvement, if at all. 1:1 image previews certainly had the effect of chewing up my hard drive space. Essentially it created a thumbnail folder that was one-fifth in size of my actual photo library! And on that note, Adobe, please use databases for thumbnails if possible. I really do not appreciate having Lightroom splatter on my hard drive as many files as I have images just for thumbnails. 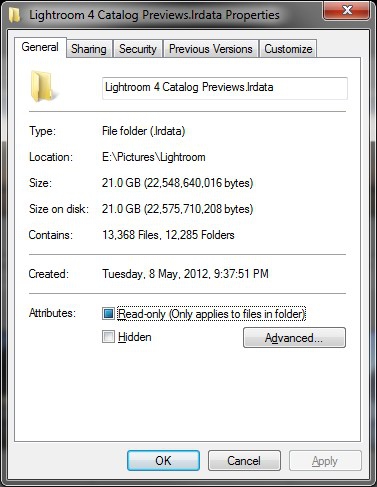
Figure 2: This is not pleasant viewing for me. IngestingThe first step in a workflow is a step called ingesting, where the photos are copied from the card to the computer. Lightroom attempts to integrate as much of a photographer's workflow as possible, and it is right there when you insert your memory card into the card reader (or connect your camera to the computer). Windows Autoplay will present its usual prompt, with Lightroom 4 being one of the choices. Selecting it starts the Lightroom (if it is not already running) with the Import dialog box. Lightroom will attempt to not copy and import duplicates, and gives the option of automatically copying the files to folders by date, or manually copy and name the folder. Given that I manually date and give a short description to the destination folder, it is an option I much appreciate. The Import dialog also allows for applying of certain settings during import, by selecting from a preset, adding metadata, or renaming files. You can also choose to convert the files to DNG. All-in-all I have little to complain about for Lightroom's ingesting capabilities. I might actually use this more often over my previous method of manually copying files over given the increased automation. 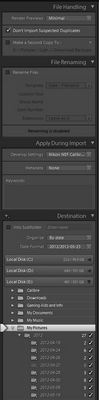
Figure 3: Plenty of options here, and good enough for most photographers, I would think. Click on the image to enlarge.
ViewingThe Library view is quite powerful, notwithstanding the performance issues. You can set four snippets of info to display above the thumbnail, and I have mine set to show folder, file name, camera used and date/time taken. You can choose to browse by folders via the folder list on the left hand side and, on the right hand side, you get to see the histogram, along with the Quick Develop settings, Keywords and Metadata information. The Quick Develop settings are a subset of the controls available in the full Develop module, which I felt were not that useful given how easy it is to drop into the Develop module, and how fiddly the controls are. 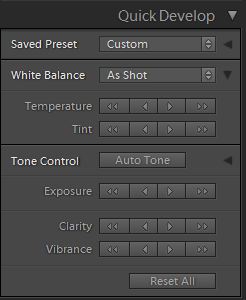
Figure 4: Tiny buttons instead of sliders; what is the point? Other niceties include the Survey view, which shows you a number of selected images, then allows you to whittle them down until you get your selects. Very useful. Also present is the Compare view, which lets you compare two images, and transfer settings (if any) between them. 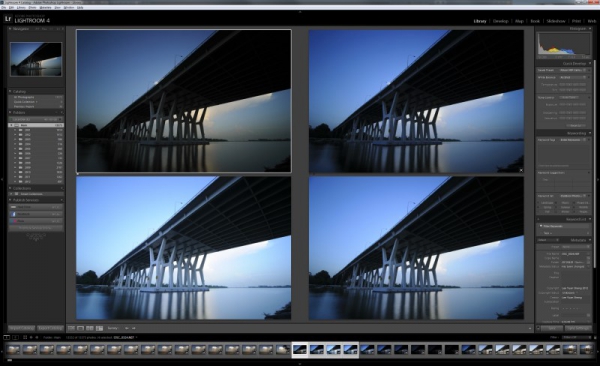
Figure 5: Making that tough decision is much easier with Survey view. If only 100% view could be enabled easily at the same time as well. Note the X at the bottom right of the top right image; it appears when the mouse hovers over the image, allowing you to disqualify it from the selection process. Click on the image to enlarge. Tagging and SelectingAt the end of a big shoot and there are hundreds or even thousands of photos, being able to quickly select and tag the photos you want is essential. I personally ended up using the flagging system to do this. There is a Reject flag as on top of the usual Selected flag, and I have come to quite like it as I have a habit of culling away photos that just are plain not good enough. After the photos are flagged, Lightroom is set to show only the photos which are flagged as selected, which I then proceed to work on. The filtering options in Lightroom are pretty advanced. In addition to flags, the filter can look at ratings, colour labels, keywords, exposure settings, camera models and my favourite, focal length and lens type. I find focal lengths have a big part to play in getting the look of an image, and it is nice to be able to home in on a certain set of focal lengths with certain keywords when looking for that particular shot. 
Figure 6: I do love my wide angles. Yes I do. Click on image to enlarge. OrganisingOrganising images can be a pretty multi-faceted thing. There are some photographers I know who have a complex system of keywords and hierarchies and what not. I just stick to labelling my images based on a simple set of keywords, and only add more if the shot is going to the stock agency (who typically wants these things labelled very thoroughly). Keywording is an important part of managing photos, but it is too easy to go overboard with a billion keywords. Which is just as well, because I do not find Lightroom to be that quick if I need to input multiple keywords. The quick keyword system only accepts one word at a time, and there is no fast way to switch between quick keywords. 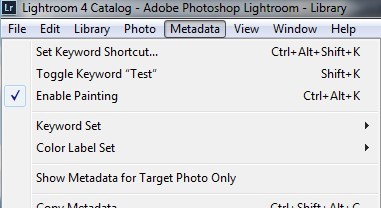
Figure 7: Adding keywords seems pretty simplistic in Lightroom. The testing of the keyword functions is also when I realised that the Menu key on the keyboard does not bring up the right-click menu. Why? Collections are another way to organise photos in Lightroom. Basically they work as advertised: A collection is just a named set of images. For me, I use collections to group images for show later. Typically they work as the keepers after a shoot. Also present are Smart Collections, which are Collections that select photos based on certain criteria. Since they work on similar attributes to that found in the filtering options, consider them a "saved" filter of sorts. For those of you who use HDR techniques and shoot panoramas, the Stacking feature allows grouping of images into a single "stack", thus only taking up one space on the grid view and filmstrip. It makes the library look a lot neater, and also avoids the fun of having to search for the group of images again in the future. There is also the Auto-stack feature, which tries to stack images based on time, since (especially for HDR) such shots tend to be taken within fairly short intervals of time. 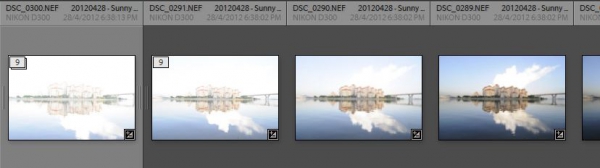
Figure 8: Two groups of stacked images side-by-side. The group of stacked images on the right has been expanded to show all the images in the stack. What is missing, though, is what Idimager calls Versioning. Lightroom's approach is the creation of Virtual Copies, which, as the name suggests, are virtual copies of the original and allows you apply different adjustments to each photo while keeping only one physical photo on the drive, though it still creates the previews. This approach is not friendly to those who come from a different workflow (some of my photos already have three to four different versions), and I have no way of grouping them together. I suppose I can use Stacks instead in this case, as Lightroom does not seem to assign any other special functionality to Stacks or Virtual Copies. Adobe really wants you to use Lightroom for your entire workflow! Another minor negative: keywords are only applied to the top image for both Virtual Copies and Stacks. The only way to do this for all the grouped images is to expand the group, select all the images that form the group and then enter the keywords. Not the fastest way to work! The Develop ModuleSome photographers will consider the real heart of Lightroom to be the Develop module, which is based on Adobe Camera RAW. The advantage of Lightroom's editing approach is in its non-destructive editing: Any changes made are not written to the file itself, but to the catalogue file instead. This has the advantage of keeping the originals intact, and being able to reset the file of any edits is pretty handy. Here we will take a look at what the Develop module can do. New to Lightroom 4 is the latest engine for Adobe Camera Raw (and thus Lightroom 4), called Process Version 2012, or PV2012. I have been told there are a lot of changes to how it works, but given that ACR for me is rarely used (see below for an explanation), I have no idea how much a difference the new version makes compared to the previous one. Note for Nikon usersI am not sure if many know this, but ACR used to totally butcher colours coming out from NEFs. The reason is partly because Nikon decided to enter the software game and did some monkeying around with the White Balance info since the D2H. While the proprietary information has since been reversed engineered, programs that did not use Nikon's API tended to give some bizarre results. 
Figure 9: While some might like the colours, the hues of blue and subtler cyan are gone in the ACR version on the right. A camera calibration feature was introduced with ACR 6, which was used in Photoshop CS5. A friend raved about it, but while the results from the tests I did with him were better than before, ACR 6 still would mutilate the hues in certain areas. Editing the photo to bring it back to the original was not impossible, but it was an extra step, and sometimes not always successful. The good news now is that now the Nikon camera calibration profiles include a "v4" version, which I am pleased to report pretty much matches up to Nikon's Capture NX2 output. It is great to have another alternative to the slow, crash-happy Capture NX2 (even if said alternative can be as slow). Since I tested this on an older Nikon D300, I wonder if anyone with the latest D4 or D800 care to share how their images held up with the newest ACR/Lightroom? 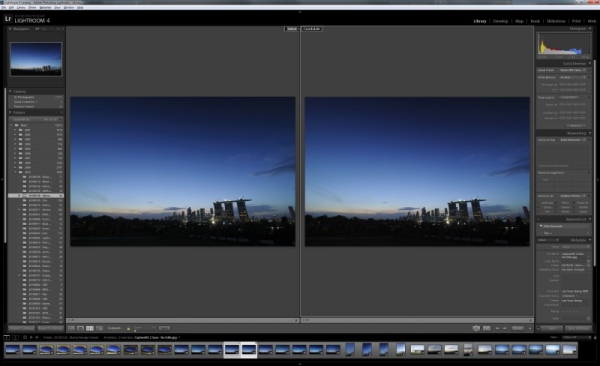
Figure 10: Oh my, are the colours finally matching? Image on the right is a JPEG directly converted from Nikon Capture NX2, while the left image is an NEF that has the Nikon Standard v4 Profile attached to it. Walkthrough: Editing an ImageIn my opinion, the easiest way to show what the Develop module can do is with a quick walkthrough of how an image is edited. So let us take an image and give it a spin! 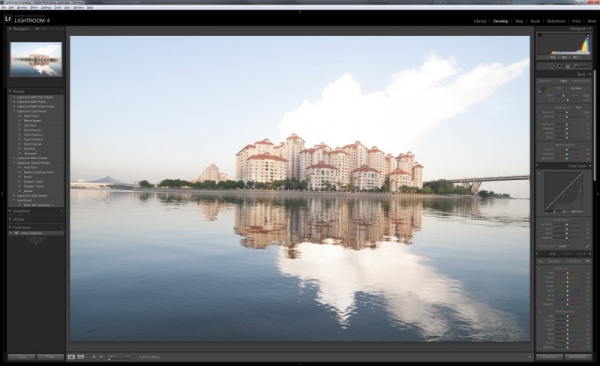
Figure 11: Our test subject. This image isn't the best, but it will be a good test of what Lightroom can do. Firstly, the horizon is not level. Clicking on the Crop Overlay too (or just hit the R key) brings up the crop tool, as well as the straighten tool. A tweak of a slider gives a level horizon, along with an automatically cropped photo that crops away the blank areas. 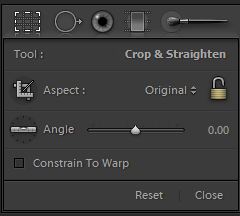
Figure 12: Crop tool. The photo is clearly overexposed by quite a bit. Let us see what we can do. 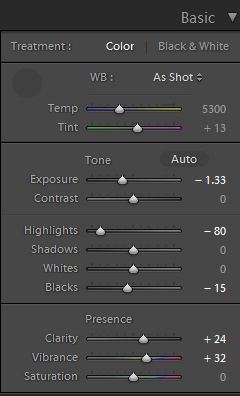
Figure 13: Basic adjustments. There can be plenty done with just these adjustments alone. I am happy with the white balance, so let us not touch that. But if needed, the eyedropper tool is actually better than the one in Photoshop (at least for CS4). Picking a neutral target is easy, thanks to the expanded view that happens when the eyedropper tool is used over an area of an image. The usual colour temperature and tint sldiers are still available. 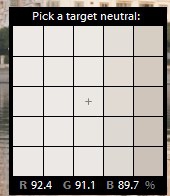
Figure 14: All eyedroppers should be like this. Since I will not be changing the white balance, I will work on the other areas instead. Dial down the exposure a bit, and try to rescue the highlights while at it. Also, adding a little punch to the colours will help. 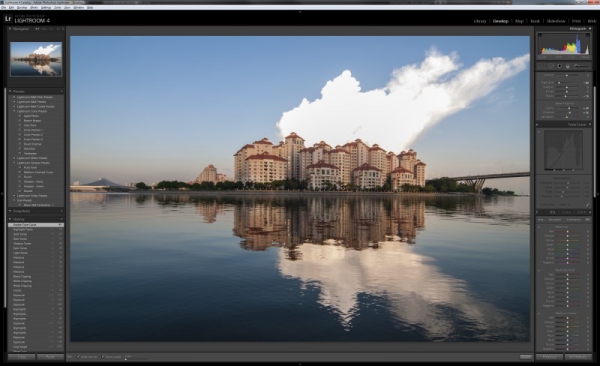
Figure 15: Looks better already. The image still looks a little flat, so time to hit the curves; Tone Curves, that is. Tweaking the highlights a little to get a bit more data back, I proceeded to carve the usual s-shape to increase contrast without compromising too much on detail. 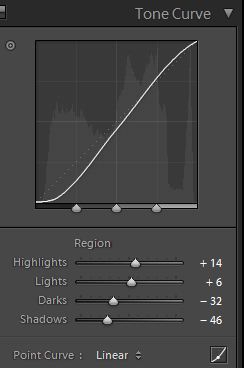
Figure 16: Tone Curves adjustments. I am using the default Lightroom method of adjusting the regions in the curve (which does prevent all kinds of funny things from happening), but I still can edit the entire curve manually by clicking on the button in the bottom right corner if I so wish. There is a neat trick here: by clicking on the dot next to the graph, the curve can be manipulated by clicking on the area in the image and dragging up and down. 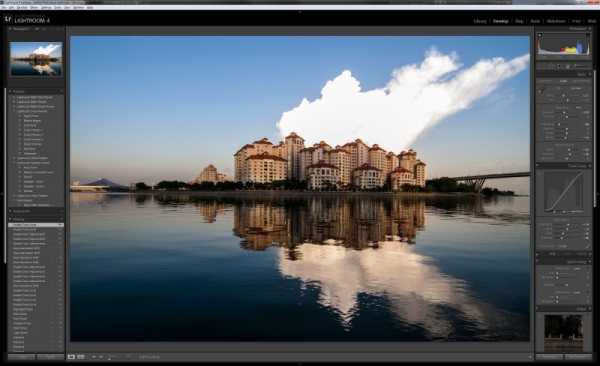
Figure 17: Less flat now. I have always been fond of blue skies, so I will increase the blues a bit further in the Hue/Saturation/Luminance adjustments. 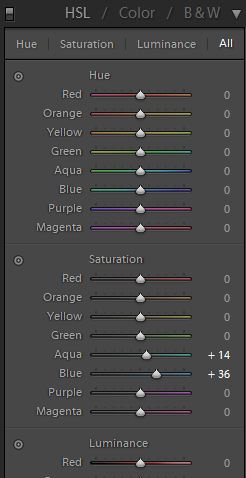
Figure 18: HSL adjustments. Note there is also a B&W section, which is a really nice feature for those into B&W photography. Since I am not into that, I just adjust the colours. The neat trick I mentioned in the Tone Curves part is also present here; just click on the dot next to the Hue, Saturation or Lightness to activate it. 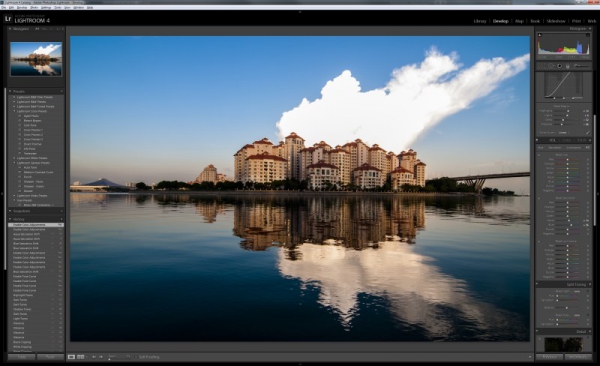
Figure 19: Mmm, blue. There are still more options, like Split Toning, Sharpening, Noise Reduction, Effects (vignetting and grain basically), and the aforementioned Camera Calibration, which I already applied upon import. There is one more option though, which is Lens Corrections. Since my trusty Tokina 11-16mm has a profile, I enable it. 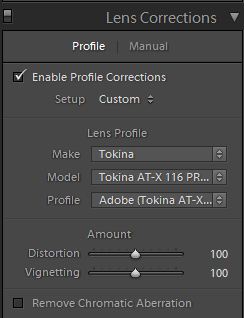
Figure 20: Lens Correction adjustments If your lens does not have a profile, you can make adjustments manually. To create your own lens profile, you will need to download a tool from Adobe first. One final note: there are also image editing presets that Lightroom comes with, which are on the left pane. You can add your own as well. 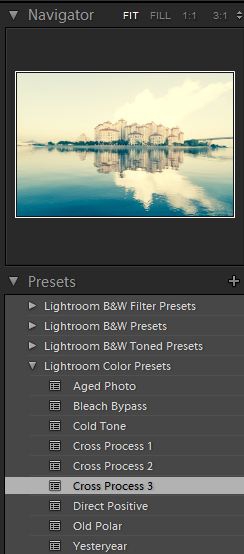
Figure 21: Image Presets, with Cross Process selected in the preview. Eww. Never did like those even back when shooting film. Now, how does the final image look? 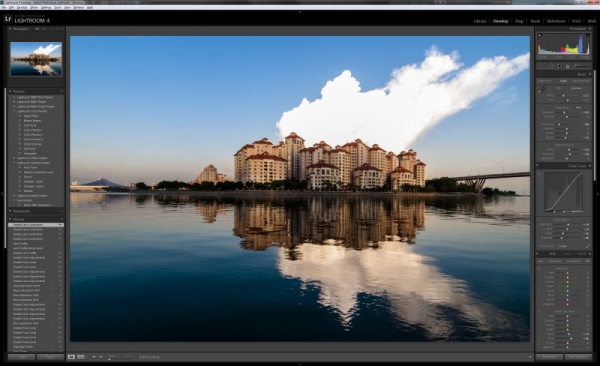
Figure 22: Total time - Less than a minute, really. As it can be seen, it will not quite solve all the problems. The example here clearly has highlights that have been clipped beyond recovery, as seen in the lack of information in the storm cloud. Still I consider it quite impressive that there is still a little detail, and that a decent photo can be produced in a short period of time. In this case it took me less than a minute (typing this walkthrough took far longer). Overall, Lightroom allows a lot of adjustments to be made, and made quickly. I think this is Lightroom's greatest strength: non-destructive editing in a fast workflow. Other ModulesThere are still yet other modules, namely Map, Book, Slideshow, Print and Web. In a way, with the exception of Map, the rest mainly deal with how your photos are presented to an audience. 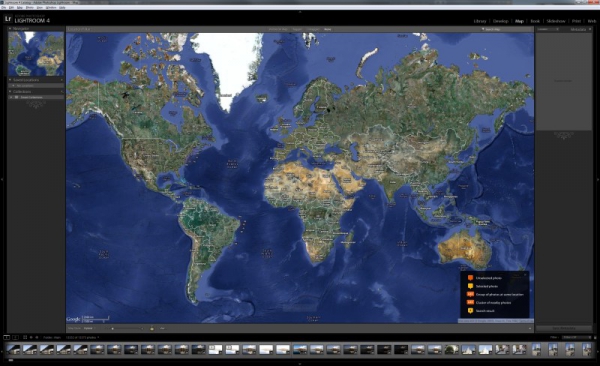
Figure 23: Hmm, Mercator projection... do I even want to start the debate? The Map module shows where photos are taken. As most of us still have cameras without a GPS, Adobe has provided a nice right-click function for GPS coordinates to be added to selected photos. Working together with the filmstrip allows them to be added to photos at a convenient speed. As can be seen from the screenshot, Adobe has partnered with Google Maps for the map information. Not something I have a quibble with, as the familiarity allows me to home in on places quickly. There is also a search function, which again, is tied to Google Maps. That said, it is something I will not be using often. 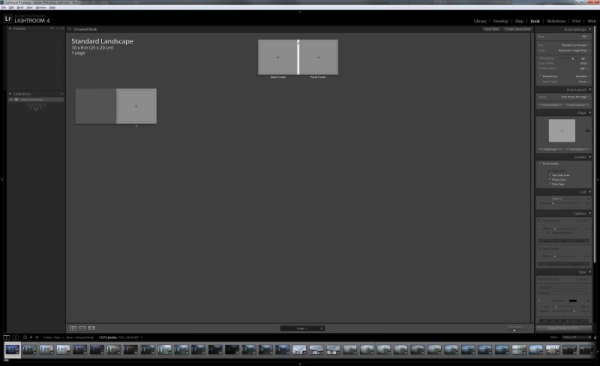
Figure 24: The Book Module The Book, Slideshow, Print and Web feature are all pretty functional to me. I tried making a small book and was happy enough with the way it worked out. Layouts are easy enough to assemble, there are guidelines (including bleed guidelines), and many options to design the book with. There are two ways to export the created book: The first is to Blurb, an online print service and the other to PDF. I highly recommend checking out The Great Photobook Round-up Review on this site to see the list of book printing services available, which also includes Blurb in the list of services reviewed. The Print module also works well enough, similar to the Book module, but without the layout options for, well, making a book. As I do not print from home, I have no idea the quality of the output. Apologies there. 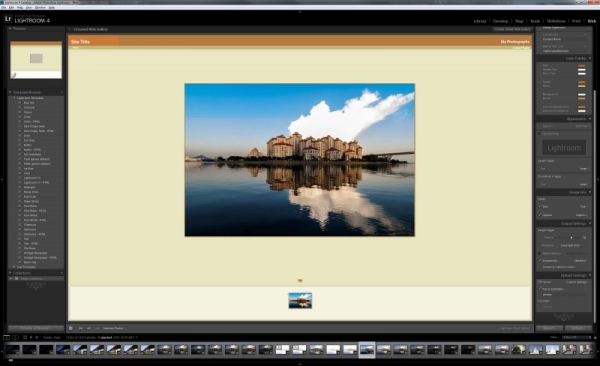
Figure 25: Do people still use stand alone web galleries? The Slideshow and Web modules are, at worst, competent. I have rarely done slideshows, with most portfolio displays being done with the image browser set to full screen and clicking forwards and backwards. I suppose if you want a compilation to show off at some event, the Slideshow module will serve your needs. Backgrounds, transitions and even music can be added to the slideshow, and the slideshow itself can be exported out as a video file, a PDF, or a series of JPEGs (the latter two of course, will not have the fancy transitions and music). The Web module creates HTML or even Flash (shudder) galleries for selected photos. I wonder if anyone still uses such things any more. What is of greater use are the new built-in plugins that can interact directly with Flickr and Facebook, and those are accessed from the Library, not Web, module. Personally I would rather use those than create a standalone website for photos. If it is for a portfolio in commercial work, it is likely I will either code my own pages, or ask a web designer to integrate it into the main website's layout instead. ConclusionAdobe's Lightroom 4 has now matured quite a bit and, for me, the biggest piece of news is in finally getting Nikon NEFs right. The workflow is fast, and I can see why many photographers are enamoured of it. However I still am not fond of the sluggishness and stuttering present throughout the whole software, but especially in the Library module. Given that I encountered quite a few forum threads voicing similar complaints while doing my research into the performance of the software, I would like to see that the problem is fixed quickly. Already there is a 4.1 update in the works, so one can hope. The other big news that has to be mentioned is the new price on Lightroom 4. At 50% off from the previous version, the US$149 price is hard to ignore. It offers a lot of features and power that can be easily accessed and for 80% of all photographers out there, this could well be the only software they ever need. It is quite the bargain in that respect. Will I be using Lightroom 4 from now on? It is hard to say. The performance issues are annoying, but the smoothness and efficiency of the workflow is seductive. Right now, I would lean towards a possible yes. When Adobe fixes the performance issues, I think it will be an unqualified yes from me. Whether you are a professional or enthusiast photographer, you should take a look too, especially at the new lowered price. Lee Yuan Sheng has been shooting for some years, way back when film was cheap, digital barely heard of, and computers were still using 14" CRT monitors. He is still waiting for the magic software that does everything for him. 
Do you enjoy using new hardware, software and accessories, then sharing your experience with others? Then join us on the Thoughts Media Review Team! We're looking for individuals who find it fun to test new gear and give their honest opinions about the experience. It's a volunteer role with some great perks. Interested? Then click here for more information.
__________________
Baka. Soku. Zan. - The justice behind the dysORDer.
|


 Hybrid Mode
